Author Topic: Gear Toy  (Read 9187 times)

Offline Rapid Roger

  • *****
  • Hero Member
  • Posts: 1468
  • Hutchinson, Kansas
    • View Profile
Gear Toy
« on: October 04, 2015, 06:23:24 pm »
OK guys and gals,
I posted a picture of a gear toy that I made several years ago and "A" request was made for me to show greater detail of it.  :o
I wasn't sure where to post it (patterns?) (tutorials?) (general?) but, IT IS A TOY so what better place to show it than here?  ;)
First, let me say that this ISN'T my pattern but, I did find out where I found it!  :) (your not going to believe this) It is a free pattern so, I feel OK with posting it (or where for you can find it.)  ;)
It is in a WOOD magazine from November 2012 issue 215! (I told you it had been a few years)  ;D
You may have to do some research to find the magazine though. Try friends that have been in woodworking for awhile or, the library or, write or call the magazine to see if you can get a back issue from November 2012.
Anyway, here goes another long winded "How I Did It" from Rog with pictures of course!
You are suppose to use 1/2" MDF according to the mag but, I used plywood of course. I also made more gears than you need to but, I over do everything (and I was making two of them)
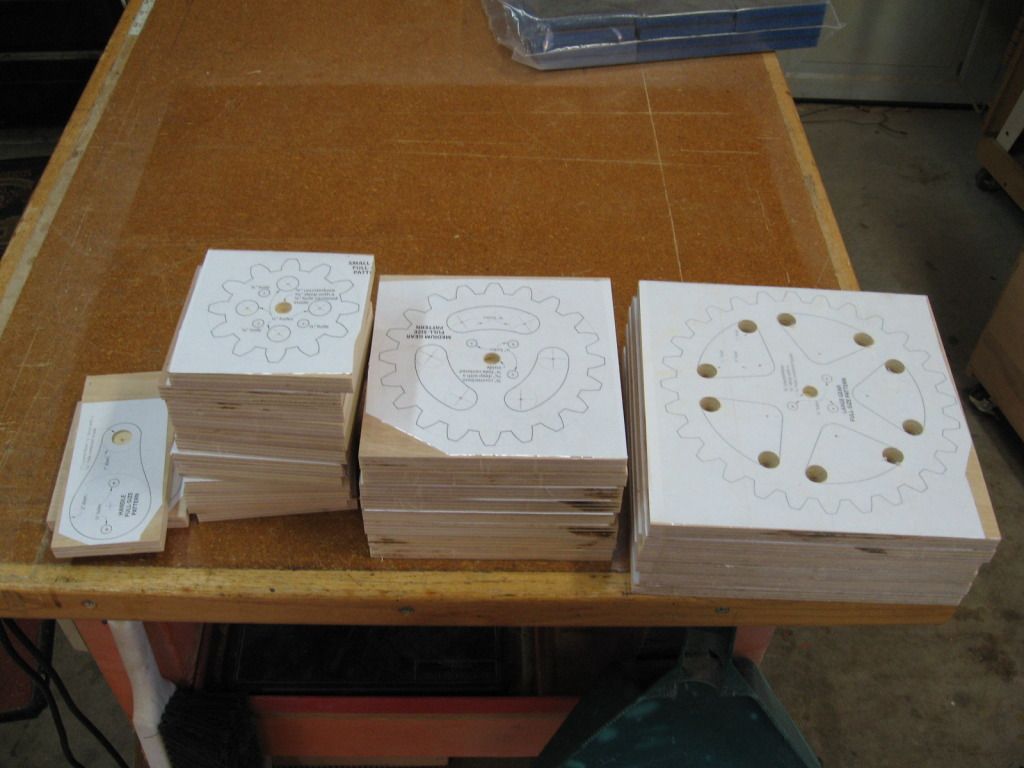
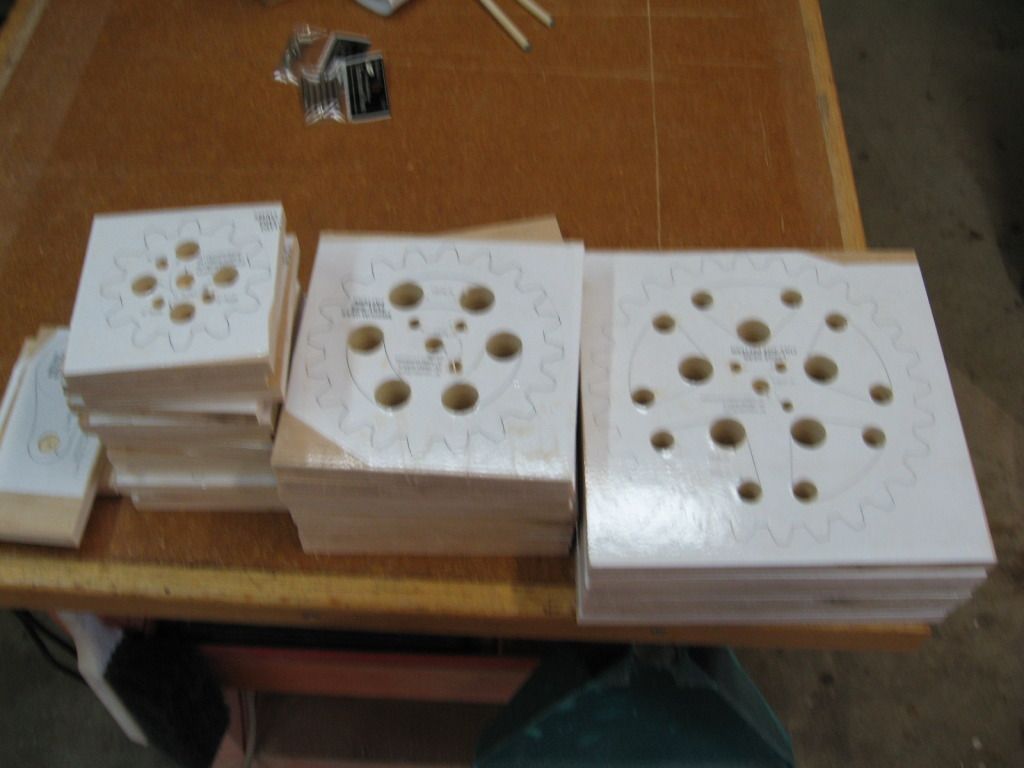
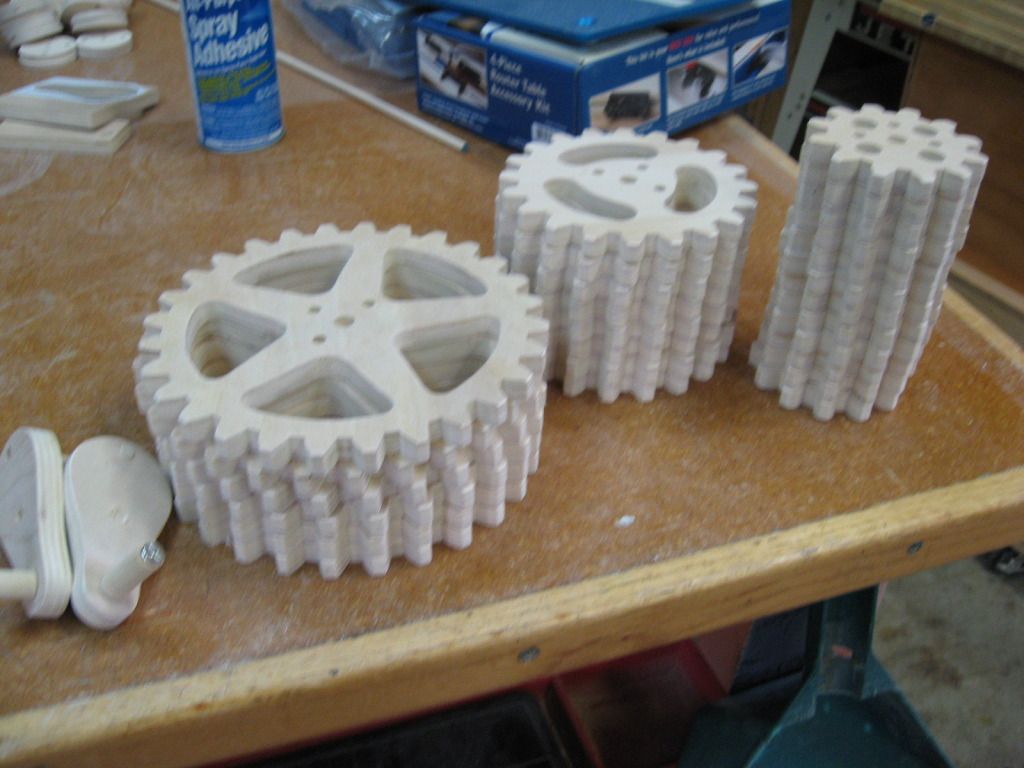
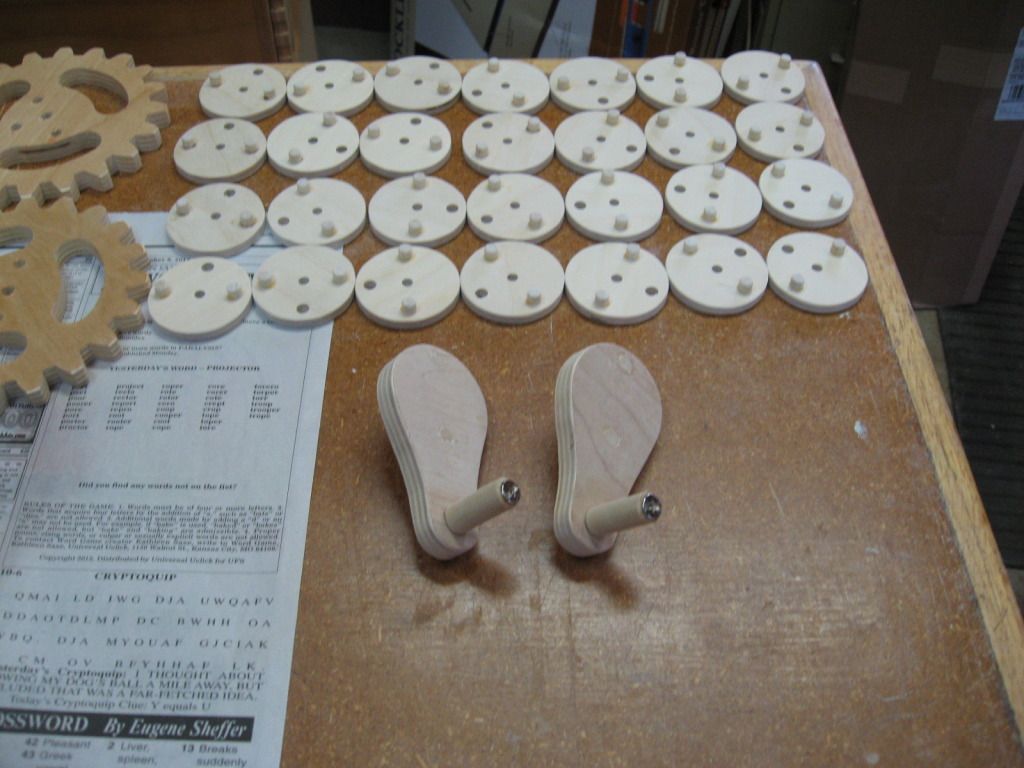


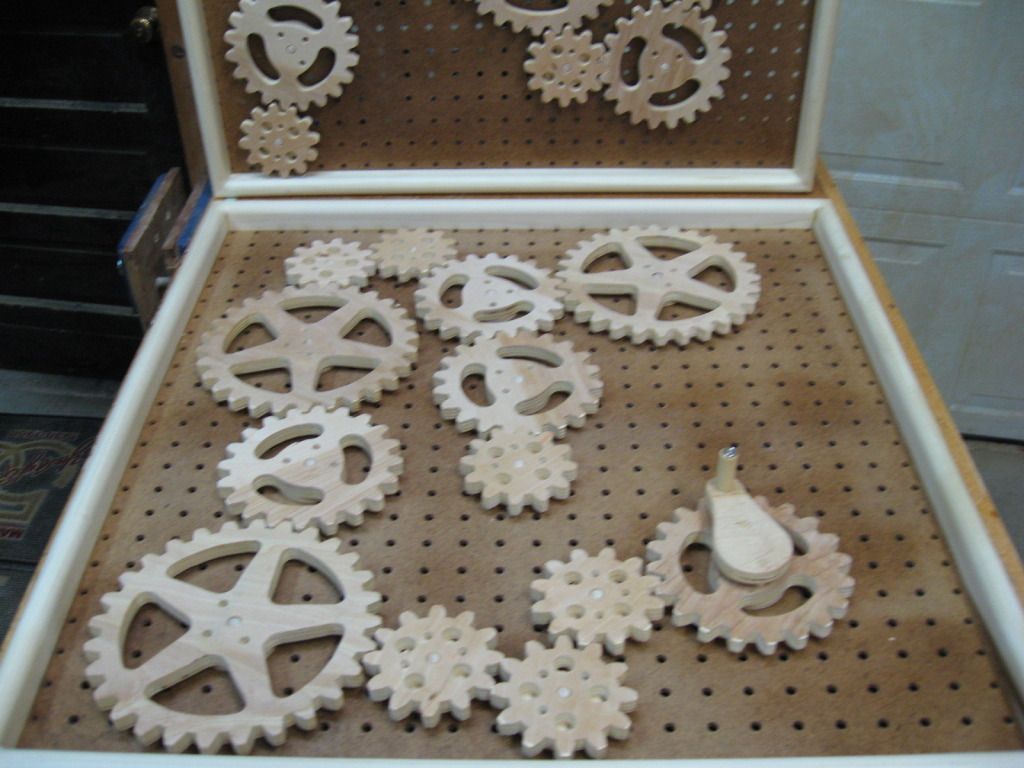
Each gear needs a "gear base" but, only one "crank handle" per set.

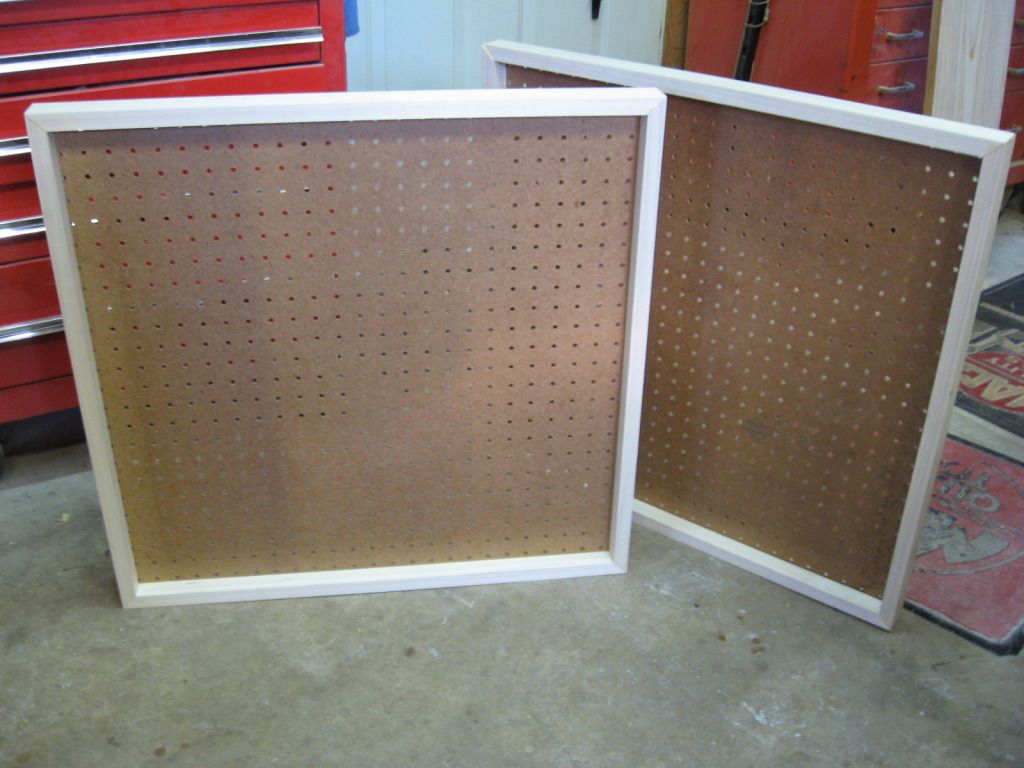
And of course some peg board for the backer. Use peg board with 1/4"holes and 1" spacing and a frame is not required but, it makes things nicer, more finished and easier to handle especially if you make the frame tall enough to cover with the gears in place.


A bit of finish on the gears (I recommend shellac for food safety reasons. Smaller people like to put things in their mouth you know.)
and you are good to go!  ;D

I notice by the pictures that it took me 8 days from start to finish  :P but, as I said, I was making two of them and I made a few more gears than necessary.
You just install the crank handle on top of one of the gears (your choice), make sure the cogs are interlocked with each gear and turn it and watch "SPINNING JOY" as each one turns in the opposite direction. And be sure to look at the face of the kid when he turns it!  ;D ;D ;D

Hope that helped. Now get started by finding the Wood magazine, copy the full sized patterns and make some saw dust and a kid happy!


Rog

PS I gave my grandsons theirs on Christmas 2012 and they are now 8 and 13 and still have the "Gear Set" in their play rooms and mess with them now and then.  8)


An ounce of responsablity is worth 10 pounds of state and fedral laws.

Offline KarlB

  • *****
  • Hero Member
  • Posts: 748
  • Naples, Florida
    • View Profile
Re: Gear Toy
« Reply #1 on: October 04, 2015, 07:17:40 pm »
Thanks Roger for the post.  That would be such a neat toy for children (as you know).

I found my issue of Wood magazine and the article is on page 26 with the patterns in the center (pp 42 - 43).  The link they published for gear template is no longer active, but a link for the pattern is here:

http://www.woodstore.net/plans/toys/346-Scrollsawn-Gears.html

For other patterns in the issue the link is here:

http://www.woodstore.net/wood0215.htm

I think plywood would be the better choice - has it held up?

Karl

Offline Rapid Roger

  • *****
  • Hero Member
  • Posts: 1468
  • Hutchinson, Kansas
    • View Profile
Re: Gear Toy
« Reply #2 on: October 05, 2015, 10:11:50 am »
That is cool that you still have the same magazine! You are right about the page numbers.  :)
As far as the full size patterns goes, mine are still in the magazine. I have a copier and just copied them right from the pages of the magazine several times and went from there.
If anyone is in serious need of the patterns, give me a PM and I will 'snail mail" them to you. Or, if Karl can scan the patterns into his computer, I'm sure he would email them. I don't have the computer smarts to do that.  ::)
Yes Karl the plywood holds up quite well. In fact, I would say probably better than MDF would as dampness and humidity can effect MDF more than plywood at times.

Rog

PS I went back and looked at your link and saw that maybe I shouldn't offer the patterns for free!  :-[  :-X  :'( I didn't know that Wood magazine was still selling them!  :o Very sorry about that folks!  :-[

Also maybe I should mention that the 1/4" dowel does not fit into the 1/4" holes in the pegboard very well. I had to ream all the holes in the pegboard a bit (1/32") larger to get free turning, smooth operation from the gears.

Rog
« Last Edit: October 05, 2015, 10:22:29 am by Rapid Roger »
An ounce of responsablity is worth 10 pounds of state and fedral laws.

CMHN

  • Guest
Re: Gear Toy
« Reply #3 on: October 20, 2015, 11:28:35 am »
You can always design your own with this template maker.  Matthias also has a downloadable version he made on this same page.   

http://woodgears.ca/gear_cutting/template.html

Great looking gears by the way.  I love anything mechanical. 

Offline WigWag Workshop

  • ****
  • Sr. Member
  • Posts: 288
    • View Profile
Re: Gear Toy
« Reply #4 on: November 03, 2015, 07:26:58 pm »
So much fun to be had, I absolutely love gear and marble toys.

Offline Hawkdave

  • ***
  • Full Member
  • Posts: 187
  • Adelaide, Australia.
    • View Profile
Re: Gear Toy
« Reply #5 on: December 28, 2015, 07:00:19 pm »
Thanks Roger for posting the gear project.

I think this is on my list of things to make soon.

Also, thanks to Karl and CMHN for the links provided.

Dave
« Last Edit: December 28, 2015, 07:02:14 pm by Hawkdave »
My parents must have been psychic, as a child they were always telling me to 'Cut It Out'. So they knew a long time ago that I would become a scroll saw artist.

Offline RickKr

  • *
  • Newbie
  • Posts: 12
    • View Profile
Re: Gear Toy
« Reply #6 on: November 26, 2018, 02:51:33 pm »
OK guys and gals,
I posted a picture of a gear toy that I made several years ago and "A" request was made for me to show greater detail of it.  :o
...snip...

Roger,

Did you stack cut these gears?  Hard to imagine cutting them individually. 

Rick
« Last Edit: November 28, 2018, 02:04:24 am by RickKr »

Offline RickKr

  • *
  • Newbie
  • Posts: 12
    • View Profile
Re: Gear Toy
« Reply #7 on: November 28, 2018, 02:29:06 am »
OK guys and gals,
I posted a picture of a gear toy that I made several years ago and "A" request was made for me to show greater detail of it.  :o
...snip...
It is in a WOOD magazine from November 2012 issue 215! (I told you it had been a few years)  ;D
You may have to do some research to find the magazine though. Try friends that have been in woodworking for awhile or, the library or, write or call the magazine to see if you can get a back issue from November 2012.
...snip...
You are suppose to use 1/2" MDF according to the mag but, I used plywood of course. I also made more gears than you need to but, I over do everything (and I was making two of them)
...snip...

This one really caught my interest.  I was looking for a horse pattern to make my granddaughter a birthday present and then I saw this.  Totally shifted my plans and I have started on it. 

I found the pattern article in Wood magazine using the information above, purchased and downloaded it. 

I am using MDF board as in the original plans, but this was predicated on the need to make it in a week and I had the MDF, but not 1/2" baltic birch plywood.  I had never scroll or band saw cut MDF.  It cuts fairly easy, although I suspect it is hard on blades.  I've spent the last two days figuring out how to make the gears quickly (stacking) and accurately.  I made a jig for sanding them round that has positions for each diameter of gear blank.  I am using my vertical mill with DRO to drill the pegboard holes rather than the printed patterns so the holes will match the PB perfectly (in theory at least).  I'm also using those holes to peg several gears in stacks. 

I tried using my scroll saw for cutting the tooth profiles but find it goes much faster and accurately on my band saw. I'm using a 1/8", 14 tpi blade with a Carter Band Saw Stabilizer which allows for as close to scroll saw function as I think is possible on a band saw. 

Here are my first practice pieces.  The partial large gear was done on the scroll saw. The small gear was done on the band saw.  The band saw teeth are substantially superior, in my opinion. 


With now less than a week to go, I opted to get a Lego kit for my granddaughter's birthday so I could work on the Gear Toy at a more reasonable pace and give it to her as a Christmas present. 

More later,

Rick
« Last Edit: November 30, 2018, 04:04:46 am by RickKr »

Offline RickKr

  • *
  • Newbie
  • Posts: 12
    • View Profile
Re: Gear Toy
« Reply #8 on: November 30, 2018, 04:17:50 am »
...snip...
I am using my vertical mill with DRO to drill the pegboard holes rather than the printed patterns so the holes will match the PB perfectly (in theory at least).  I'm also using those holes to peg several gears in stacks. 
...snip...

My vertical mill with DRO, drilling the center holes.  Note DRO is at 0,0.   I had used a laser center-finder to line up the three peg holes and then centered the mill on the center pivot hole and zeroed the two axes, X and Y. 


And drilling the peg holes, for both the pegboard but also for locking together stacked gears.  Note the DROs show peg holes position.  The peg holes are on 1" centers since that is the hole pattern of the pegboard.  Each hole is exactly 1/2" off of the gear centerline in each axis direction, so running the DRO to 0.500" puts it right on spot. 


Here are all of the stacked and pinned gear blanks.  These were stacked in anticipation of scroll sawing, so the maximum height was 1.5".  I ended up cutting them out on my bandsaw, so stacking could have been taller, except the internal cutout of the medium and large gears required maintaining the 1.5" max.


Rick
« Last Edit: December 01, 2018, 02:23:30 am by RickKr »

Offline RickKr

  • *
  • Newbie
  • Posts: 12
    • View Profile
Re: Gear Toy
« Reply #9 on: December 01, 2018, 02:35:03 am »
I cut the gear blank and gear base rough ODs on the bandsaw.  Shown is the Carter Band Saw Stabilizer I mentioned earlier for blades under 1/4" which allows effective scroll-like cutting.  It is a single, top guide, no bottom guides, which lets the blade twist a bit.  Forward tension on the blade is created by pushing the single bearing guide forward, keeping the blade securing in the groove in the bearing when backing out of cuts.  Makes if feasible to scroll cut tall pieces and stacks in surprisingly tight curves/turns. 

No tight turns with these blanks, in either the OD or cutting out the teeth.  Here I am using a 3/16" wide, 6tpi blade to cut the ODs.


Rick
« Last Edit: December 01, 2018, 02:38:07 am by RickKr »

Offline RickKr

  • *
  • Newbie
  • Posts: 12
    • View Profile
Re: Gear Toy
« Reply #10 on: December 01, 2018, 02:45:40 am »
Then came cutting the gear teeth.  For this, I used a 1/8" wide, 14tpi blade, again in the Carter Stabilizer guide.  The curves on the gears did not require use of the 1/8" blade, but making the turns inside to bottom did. 


After the tooth profiles were cut, I cleaned up the gullets using the bandsaw blade.  I held the tooth bottom in close to the blade and moved it laterally using the front surface of the blade sort of like extremely fine sandpaper to clean out the roughness left by the turns at the bottom.  Worked surprisingly well and allowed me to get nice square corners.  Before is the gullet on the left, after on the right.


Bandsaw cut gear teeth.


Rick
« Last Edit: December 01, 2018, 02:52:56 am by RickKr »

Offline RickKr

  • *
  • Newbie
  • Posts: 12
    • View Profile
Re: Gear Toy
« Reply #11 on: December 01, 2018, 03:33:35 am »
I made a jig for my 4x36" belt sander table for sanding the gear and gear bases to finish size.  To minimize the amount of sanding, I did the OD sanding after cutting out the teeth.  No point in sanding wood that won't remain. 

The jig consisted of a base which had the key on the bottom for the table slot.  This key was pivoted on the left side and slotted on the right to allow adjusting its distance from the belt, the use of which will be discussed below. 


The jig had a top slider piece that had pivot holes for each size of gear and the base.  It also pivoted on the left side, on the same point as the base.  It had a pivoting slot on the right, but it was never locked down.  This pivot allowed the slider to move inward and outward so the roughed gears could be sanded progressively smaller, with the slider pivoting in until it reached the end of the slot, which acted as a stop on the sanding action. The point of that "stop" was set by locking the base distance from the belt and remained the same for all diameters of blanks. 


Pivot holes were placed such that each gear would "stop" sanding at the correct finish diameter (visible in the second photo).  The gear base is 2" OD.  The gears started at 3.375" OD and increased by two inches for the medium (5.375") and large (7.375") gears.  This jig made for very fast and accurate sanding of the ODs. 


Gear tooth profiles were sanded on a 1x30" belt sander.  The smaller size sander was required due to the narrow width of the platten, for getting in there to the bottoms of the tooth side profiles.  The bottoms had alread been cleaned up adequately using the bandsaw as described in an earlier post, but I did go in with sanding blades on the scroll saw to sand down the few spots missed by the bandsaw. 

Rick
« Last Edit: December 01, 2018, 03:36:45 am by RickKr »

Offline RickKr

  • *
  • Newbie
  • Posts: 12
    • View Profile
Re: Gear Toy
« Reply #12 on: December 01, 2018, 03:48:19 am »
Here are the finished gear teeth cut and sanded in the blanks.


Next came drilling the holes for the cuttouts, prior to scroll sawing. I used 1/2" and 3/4" Forstner bits for the drilling, but the sanding sleeve for the 1/2" spindle sander spindle is oversized, so the smaller radiuses ended up closer to 5/8". 


And the finished scroll cut and spindle sanded cutouts. 


And with this, I am out of material for today.  Still to come for the gears is drilling out the respective peg and center pivot holes, but that may have to wait a bit. Granddaughter arrives tomorrow morning. 

Rick
« Last Edit: December 01, 2018, 03:54:05 am by RickKr »


SMF

Teknoromi