Show Posts

This section allows you to view all posts made by this member. Note that you can only see posts made in areas you currently have access to.


Messages - Rapid Roger

Pages: 1 ... 35 36 [37] 38 39 ... 98
541
General Scroll Saw Talk / Re: I recieved my band saw blade!
« on: August 12, 2013, 06:20:53 pm »
How many band-aids did you need after folding the old blade?  ;D
I used to have to do that where I worked years ago. Almost every time I would get a nick or two but, still I was the best guy in the shop to do it. I've seen some guys get some really nasty cuts when they didn't grip the blade tight enough and it would spring open at the wrong time. I didn't step on the blade (but, that is probably the safest way to do it) I just held it in both hands with my fingers and give it a twist  and it would pop together in an instant.  ;)
Buy the way, I don't have a bandsaw (sure wish I did) but, I've read that the Timberwolf brand is  used by a lot of people and comes highly recommended. Congrats on your purchase and good luck and have fun with your saw.

Rog

542
Brag Forum / Re: I'm so glad to see...
« on: August 01, 2013, 03:30:03 pm »
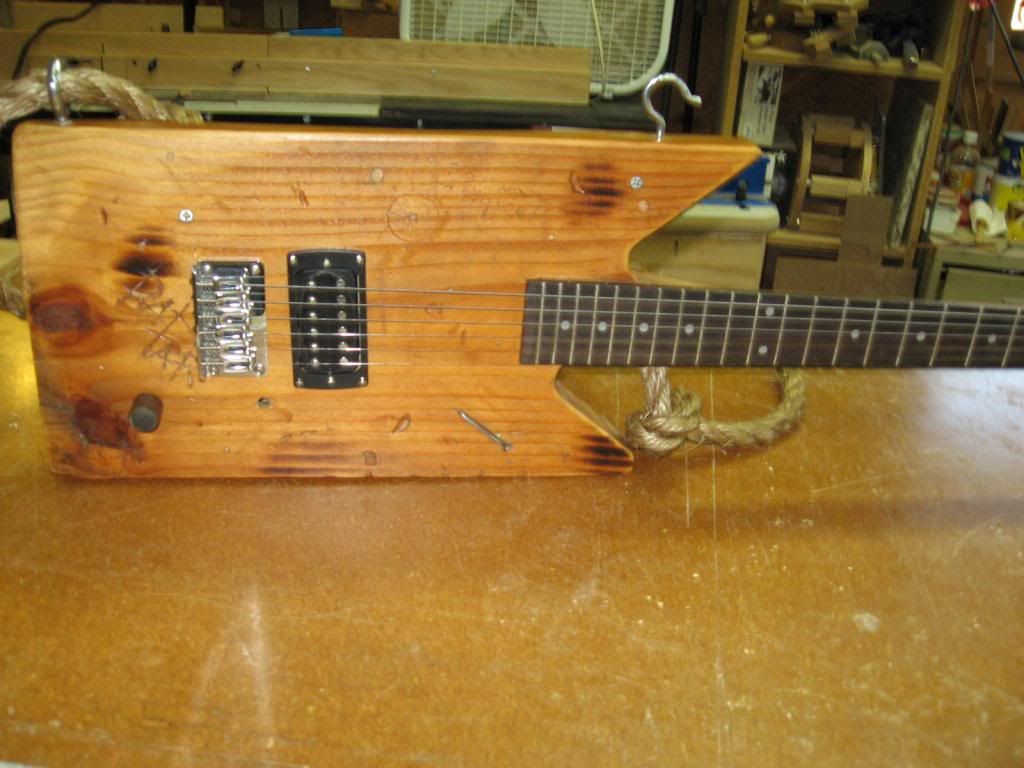
Well, it didn't require use of the scroll saw but, as promised, I did get the "Rat Tar" done and thought I would post a picture of it for all the rar rodders to enjoy.  ;D :D ;)
Yes, I do have way too much time on my hands.  ::)


Rog


543
Tutorials, Techniques and Tips / Re: Surprise wood find
« on: July 28, 2013, 12:12:34 pm »
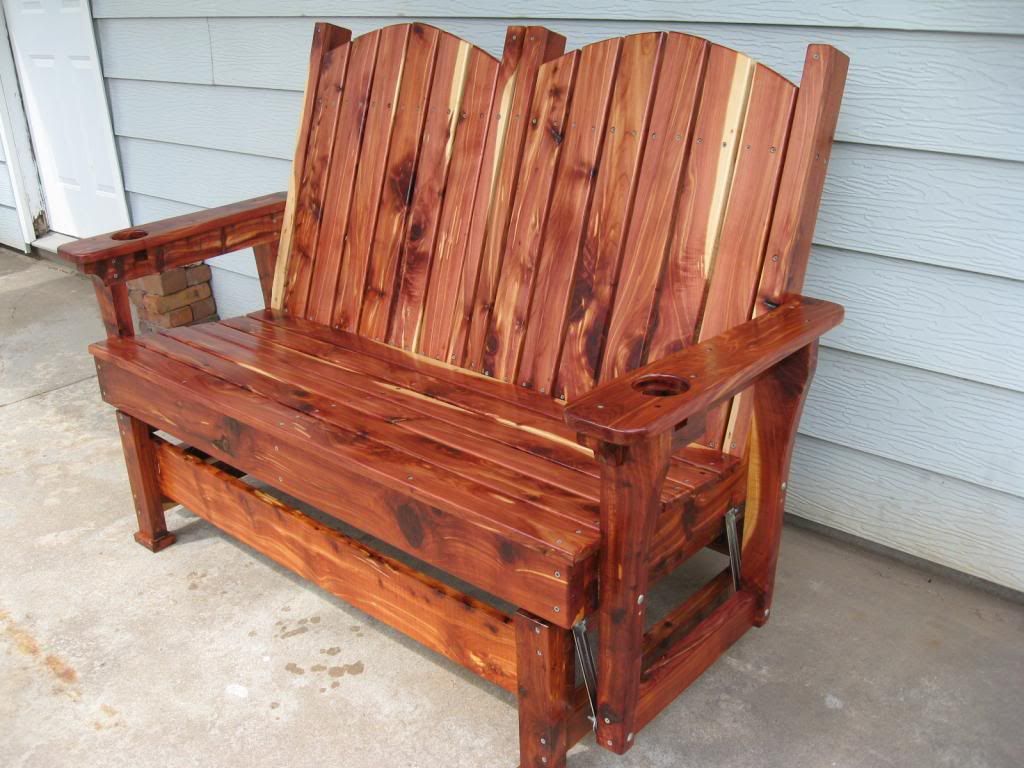
I've used some cedar in the recent past but, not for scrolling, mine was a bit thicker........


 :D ;D ;)

I'm not sure how well it will scroll, especially more detailed cuttings, but, for larger cuts I think it would look very nice for a "WELCOME" sign or maybe the family name type sign.
I say "GO FOR IT!" and report back with how it cut and some pictures of you work. I would be interested seeing it.
The wood is priced right anyway!

Rog   

544
Pattern Requests. / Re: headstone
« on: July 28, 2013, 11:50:39 am »
If you are cutting it from wood and it will be out doors I would suggest teak or cedar wood as they stand up better in the soil and outdoor weather. I would personally not put a finish on the wood other than maybe saturate it with BLO (Boiled Linseed Oil) which will help the color and pop the grain. A finish will wear off and have to be re-done every two years or so.
Just some suggestions.

Rog

545
General Scroll Saw Talk / Re: Cutting Board Question
« on: July 27, 2013, 09:02:53 pm »
I think that cherry or almost any hard wood works well. Stay away from softer woods (pine or poplar come to mind) and I would advise against oak especially red oak. Some wood has larger and more open pores that can trap germs easily which is a no no.
Seal with oils of almost any kind but, do not use anything with a harder surface like paint or polyurethane which will chip off during use.
And of course, keep it out of the dishwasher. Just wipe it down with a wet cloth and dry it off with a paper towel and stand it on edge for storage.

Rog

546
General Scroll Saw Talk / Re: Heat For My Shop
« on: July 24, 2013, 06:44:34 pm »
Don't sweat the small stuff. I had a gas furnace in my shop for years and no problems. In order for saw dust in the air to explode it would have to be so heavy that you couldn't see or breath.
I live in Kansas and we do have grain elevators explode from dust in the air but, you would have to see what the air and surrounding surfaces look like to understand how it happens. The humidity must be right, almost a 50/50 mix of fuel/air ratio in an enclosed space and a good source of heat, spark or flame is what it takes to ignite.
Next time you go camping or are around an open fire, throw a hand full of flour into the fire. Yes, it will burn and maybe even make a small fire ball but, I'll bet you will use a few hand fulls of flour before you get it to burn.
I have since changed to a small electric heater for efficiency and convenience but, not because of being afraid of a fire or explosion from gas.
I once had my shop in the basement where the gas house furnace is and I ask the furnace repairman about the saw dust (I was more concerned about the filter and getting dust up stairs) he told me not to worry about it.

Rog 

547
General Scroll Saw Talk / Re: Making Fun
« on: July 24, 2013, 09:18:08 am »
When I first read your post last night (before the edit) I was concerned about a few comments that I've made lately. I don't in anyway want to put down fret work, I have done a lot of it in the past and still do from time to time. That is the way most of us get started using a scroll saw by seeing something in fret work and wanting to try it ourselves.
I just have discovered that a scroll saw can do a lot more than cutting slots in thin wood for pictures, plaques, signs, crosses etc.. With the tilting table (or upper arm) bowls, vases, pitchers, toys, games and a whole lot of other things can be done with a scroll saw.
I just try to encourage other people to try new and different ways of using our favorite tool and stretch their imagination and step outside the box (or lines).  ;D
No offence meant or taken.  ;)

Rog 

548
Brag Forum / Re: Salt & Pepper Shakers
« on: July 23, 2013, 07:24:56 pm »
Dustin, I just watched your video and enjoyed seeing how you made your salt and pepper shakers.
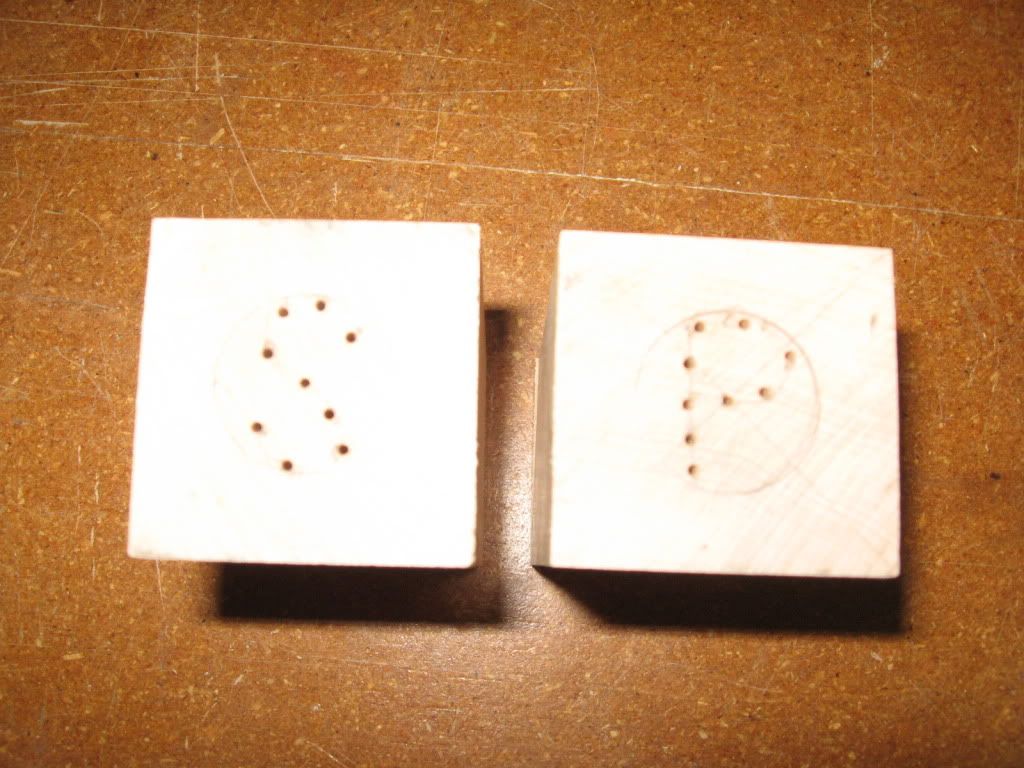
I don't mean to show off but, I made some shakers a few years ago and thought I would show you and others how I did it and show that there is more than one way to "skin a cat".
I guess that the real problem with mine is that you need a drill press and a 3/4" forstner drill bit and, I cheated and used a table saw to begin with but, it could be done with a scrollsaw also. I also started with some 1-1/2" stock but, I also did a glue up of some 3/4" wood and even stacked up some plywood for one set.

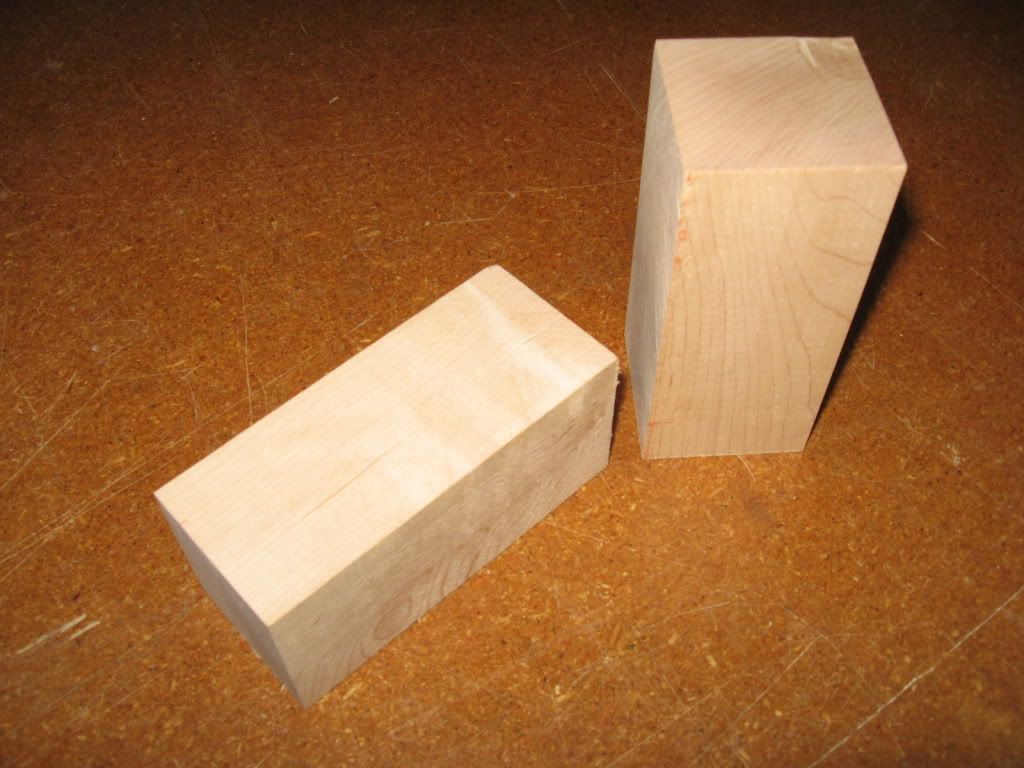
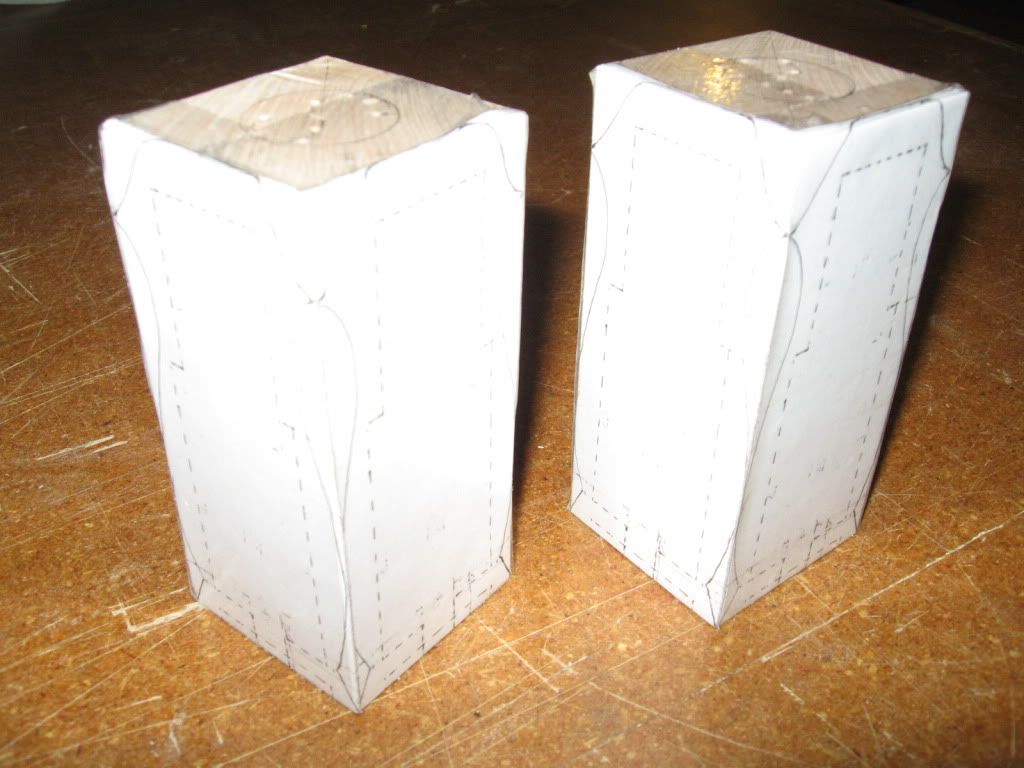
In this set of construction pictures I used maple blocks.


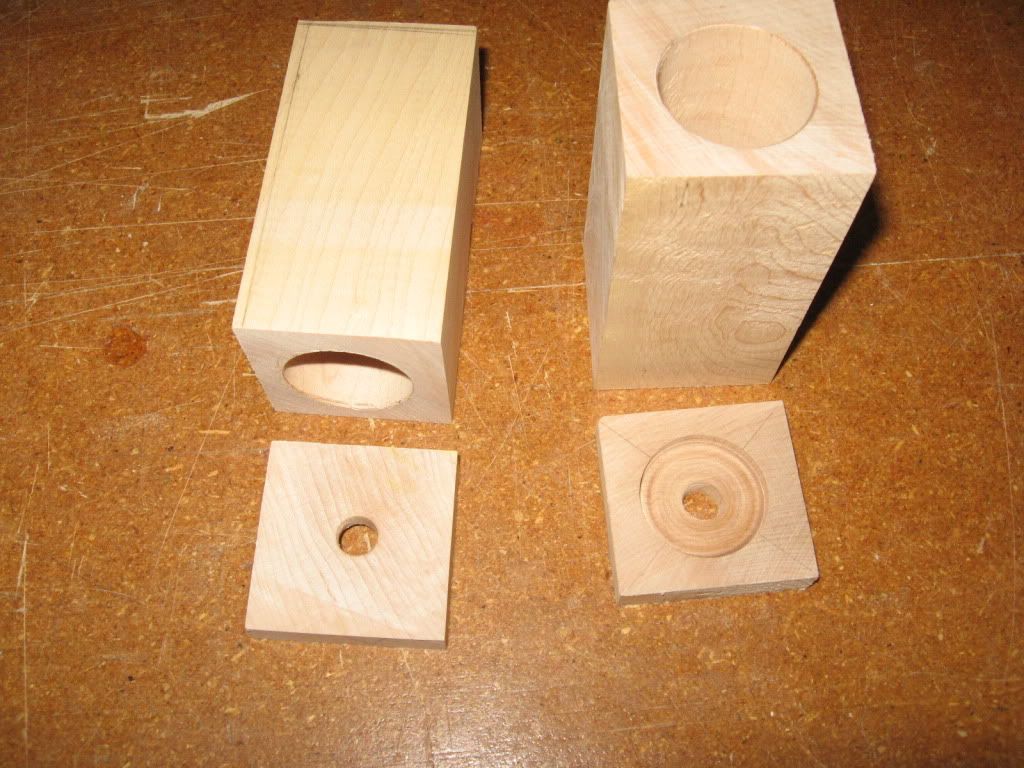
I lopped off one end about 1/4"  and then drilled the 3/4" hole in the main body and a 1/4" or 3/8" hole in the base for a cork plug. Oh yea, I also drilled a 3/4" recess in the bottom for plug clearance so that they would set flat on the table.


I also drilled the holes in the top of the of the main body for the S&P. (very clever don't you think?  ;D)


Re-glued the bottom back on to make the whole thing one piece again.


Printed out the patterns that I had drawn ahead of time. Note that it takes two copies to make a 3D pattern and you have to save the drop and re tape it on the blank after the cut so you can see where you have to cut the other two sides.


Once the Salt and pepper shakers are totally cut out, just sand and finish, fill with salt (or pepper) install the cork and you are good to go!  ;)


As I said, I don't want to steal your thunder but, I think it is nice to see different ways of doing things and ideas from other people.
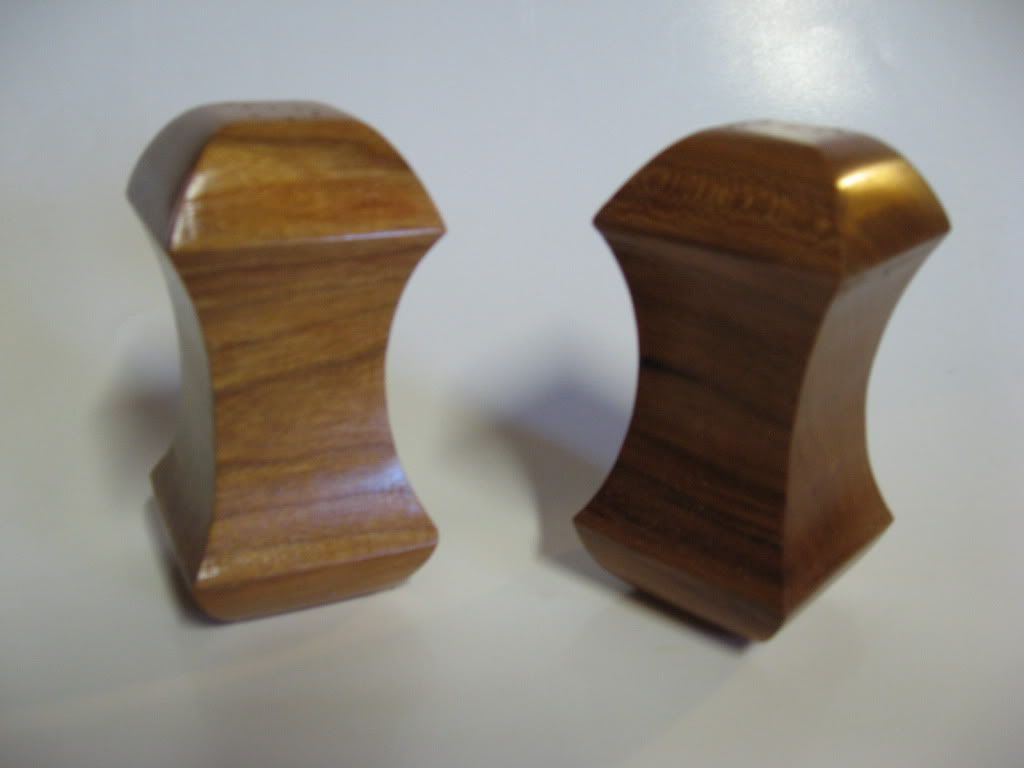
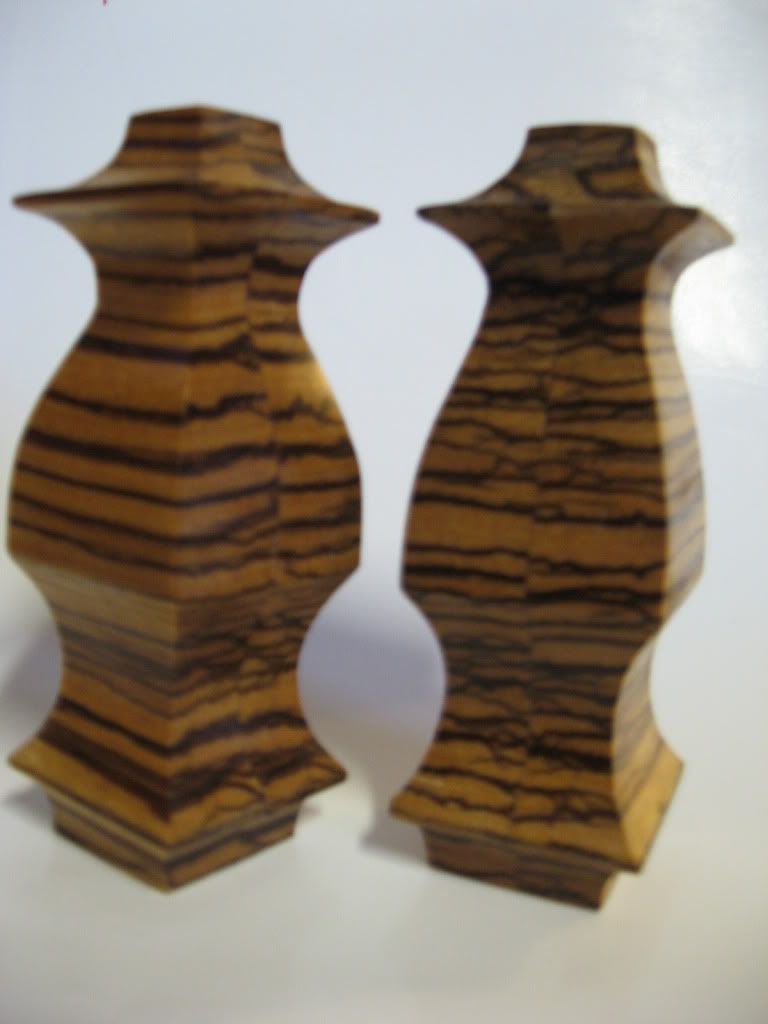
Here are some of the other designs that I came up with.


Apple core out of cherry.


Egg made of plywood


Oriental using zebra wood. (note that it is laminated from two 3/4" pieces)


Hope that this gives you and others some ideas and different things to try. As I always say there are a lot of ways to do things and nobody knows the "RIGHT" way to do any of them.  ;)

Rog     

549
General Scroll Saw Talk / Re: Making Fun
« on: July 23, 2013, 05:55:26 pm »
I've made LOTS of games and toys for my grandchildren over the years. I have five, 2 boys and three girls between the ages of 5 and 13.
Every Christmas the kids want to "See what Papa made me this year."  I think they are getting tired of it....No batteries needed.  :D :D :D :D
Several years ago I made these for the two oldest grand daughters.(the youngest wasn't here yet)
Sorry about the quality of the picture, it was taken with my old camera.


Don't even ask about a pattern, I pretty much drew it up and cut parts as I went.  ;)

Rog

550
General Scroll Saw Talk / Re: Mitre Saw Blade Selection
« on: July 22, 2013, 06:41:35 pm »
Try to find a blade with as many teeth as possible. Or maybe marked as a "plywood" or "finish" blade.
I don't use my miter saw for anything but rough cutting but, on my table saw I have as much as 100 tooth blade for thinner wood and nice smooth cuts. I have also heard of as much as 200 tooth blades but, I've never seen one.
Most miter saws use "miter saw blades" but, I think that if the arbor is 5/8" a standard 10" table saw blade would work also.

Rog

551
Brag Forum / Re: I'm so glad to see...
« on: July 20, 2013, 12:33:38 pm »
Thanks for all the nice comments. I'll try to answer some of the questions.....

Nice work, Roger,
I do play guitar and I wonder what the resonance and sound quality of a Cedar body will be like.
Thanks for sharing with us and God Bless! Spirithorse

Well, not only do I NOT play a guitar, my "tin ear" doesn't know from resonance from apple butter. It is an electric and I don't really think the kind of wood has a lot of bearing on sound quality it would be more in the amp and pickup used I think.


Roger - the guitar body looks great.

One thought - cedar is pretty soft so you might add a pick guard to keep the scratching down. A wooden guard made from some thin hardwood would look slick on there.


Well, if I were really worried about it, I would probably do that, but since it is just a cheap instrument anyway and I figure that my grandkids are going to destroy it also, I would sooner see the grain in the cedar
wood while it is still around. I suppose a piece of plexiglass would do the trick of protection and visibility at the same time and if it were more of a quality guitar and was going to be used by someone a lot I would do that.


very nice guitar! that cedar looks really cool!
must be great to have a  self made instrument like that!

was it hard to put back all the electric equipment and stuff?
how does your son say's that it plays?


Yes, it was a bit fussy trying to re-solder those tiny wires from the pickup, volume knob and amp outlet but, nothing that a bit of patience can't handle. Believe it or not, the harder part was re-stringing the darn thing at reassembly time. I was too cheap to buy a new set of strings and the old ones were all curled up and didn't want to straighten out.  ;D  But, as usual I gotter done anyway!
Actually, my son was here yesterday! He lives in a different town and brought the grandkids for grandma to babysit this week end. (So that he and his wife could celebrate their anniversary.)
While he was here, he gave it a good once over and tuned it up (by ear) and handed it to his six year old son who sat down and proceed to play a simple little song on it!  :o The boy has GOT to teach Papa how to do that!  ::) ;D   (Actually GS has his own guitar just like my donor guitar)
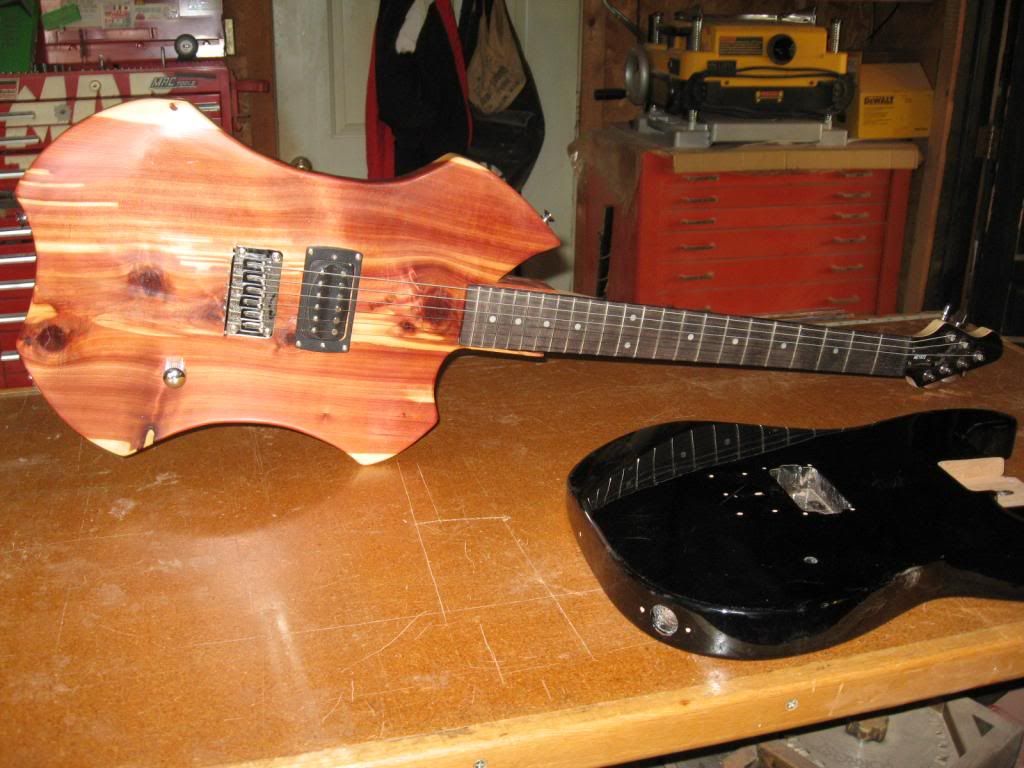
Everyone got to play a little bit (granddaughter, daughter-in-law, son, and grandson) and they all liked how it looked.

Rog

PS Believe it or not, I going to do another guitar body......This time it's going to be a "Rat Tar"....Kinda like a "Rat Rod" that hot rodders build. It won't require any scroll saw work but, I may post a picture of it in this thread anyway just for laughs.

Check in from time to time if you are interested.

Rog

552
Tutorials, Techniques and Tips / Re: Custom portrait frame
« on: July 18, 2013, 05:59:20 pm »
I enjoyed the tutorial. Good job!
I make a lot of frames myself and have a few tricks and jigs to make a few things a bit easier and quicker but, basically the same method.
As we all know there are a BUNCH of ways to skin a cat.  ;)

Rog

553
General Scroll Saw Talk / Re: mitre sled vs mitre saw
« on: July 17, 2013, 09:56:52 am »
For picture frames, I highly recommend the miter sled instead of the miter saw. It is much more accurate and easier to use.
As long as you cut the ends on the opposite sides as shown in the video and use stop blocks for the length of the sides, you will get perfect frames every time. 
It doesn't have to be as fancy as the one in the video, in fact, mine does not have the front and back fence at all!  :o  :o I just used a piece of plywood, two runners, and two 45 degree fences. Just make sure you never cut all the way through the plywood base.  ;) As long as the fences form a perfect 90 degree corner at the front and are straight, you are good to go!
Much cheaper, easier to use and a guaranteed true miter corner every time, regardless of the size of the frame!

Rog

554
The Coffee Shop / Re: Where can you buy a wood vice?
« on: July 16, 2013, 01:09:06 pm »
If you would just like to make some wooden jaws to fit your mechanics vice (I've done that for mine) cut two pieces of wood about 1-1/2" to 2" wide, a bit longer than the vice jaw is wide and 1/2" thick. You then can drill some shallow holes on one side with a forstner bit to match some rare earth magnets (I put 3 on each jaw because the jaw is 6" wide.) and glue the magnets into the holes with super glue. Make sure the magnets are flush to the wood and glue another strip 1/4" thick and 3/4 wide x  the same length as the first piece to the top edge of the wooden jaw face. Basicly make an upside down "L" shape for a location surface.
Now the "ledge" will keep the jaw even with the top of the vice and the magnets will hold them in place to use to protect your wood yet easily removable when you need the vice for other uses.

Easy peasy! And cheap too!

Rog

555
Brag Forum / Re: I'm so glad to see...
« on: July 15, 2013, 04:52:49 pm »
Well, I got 'er done and back together! It even makes noise, but without an amp not a very loud noise. :D Doesn't really matter as I don't play guitar or any other instrument anyway.  ::)
Thought you might like to see the finished project so here it is!


Guess I'll keep it around for the grandkids to play with.  ;)

Rog

Pages: 1 ... 35 36 [37] 38 39 ... 98

SMF

Teknoromi