Show Posts

This section allows you to view all posts made by this member. Note that you can only see posts made in areas you currently have access to.


Messages - Rapid Roger

Pages: 1 ... 33 34 [35] 36 37 ... 98
511
The Coffee Shop / Re: Advice on a Table Saw Please
« on: September 24, 2013, 11:02:59 am »
I'm pretty much like Bill the Diver. I bought a Jet table saw about six years ago. It is 61" long and mounted on wheels as I'm short on space too and have to roll it out into the garage to use it. (I have a garage door between the shop and garage) I have to move the wifes car out but, still it is one of the most used tools for almost any job that I do.

I do have another suggestion for your problem....
Maybe there is nothing wrong with your current saw that a new blade wouldn't help solve. You said that it is losing power and hard woods are getting harder to cut well that might be an indication that you have a dull blade. I'm not sure if you have changed blades recently but, an electric motor doesn't normally just "lose" power unless the bearings are worn out and then you might notice a lot of heat or even smoke coming from the motor. (NEVER LET THE SMOKE OUT OF AN ELECTRIC MOTOR you'll never get it back in!  :D :D :D :D)
A tune up on the saw (blade squareness, fence, belt tension and a sharp blade) does wonders to most saws of any style.   

Rog

512
General Scroll Saw Talk / Re: Cutting Compound Patterns.... :+(
« on: September 23, 2013, 04:57:11 pm »
Just to add my two cents....
I think you may be right about the "new" 2 x 4 being a bit wet and clogging the gullets in the blade. That will sure slow things down if the saw dust can't get cleaned out fast enough. Also, I have noticed that cutting with the grain (rip cut) is usually a lot slower and harder  to cut than cutting across the grain (cross cut)with almost any wood.
As a bit of a hint, a cross cut blade on a table saw has quite a few more teeth than a rip blade generally speaking.  Of course the two blades also have a different tooth style but, lets not get too technical about all that.
So, in the future you might take some of those clues into consideration when choosing a blade for your scroll saw. Type of wood, thickness, direction of most cuts to be made and how wet or dry the wood is.

Rog

513
The Coffee Shop / Re: Chevy Trucks
« on: September 23, 2013, 09:23:24 am »
FORD means......"First On Race Day".

Rog

514
The Coffee Shop / Re: Chevy Trucks
« on: September 22, 2013, 04:38:46 pm »
I liked that! I'm not a  Shovey fan, can you tell?  ;)


Reminded me of another one I  heard not long ago...

95% of all lawyers give the rest a bad name.

Rog

515
General Scroll Saw Talk / Re: Finishing: Shellac and Alcohol Mix
« on: September 22, 2013, 12:27:34 pm »
PS to the PS.

I forgot to mention......After using either of the two concoctions that I described you can add more coats of either shellac or polyurethane at full strength for a glossier or longer wearing finish.
The recipes are what I call a sealing coat meant to pop the grain and or fill the pores of the wood as a first coat. Some people or projects require a smoother, shinier finish. I also usually sand between finish coats with a piece of brown paper bag to get rid of the "nibs" that pop up as the finish dries.  Nibs are caused by air bubbles or lint floating in the air or a speck of dirt in your brush. Not that THAT ever happens to ME!  :D :D :D

Rog

516
General Scroll Saw Talk / Re: Finishing: Shellac and Alcohol Mix
« on: September 22, 2013, 12:02:38 pm »
Since my name was mentioned in the original post, I'll respond to how I do it. That is in no way saying it's the correct way, just "MY" way.
I use one pint mason jars that I buy at the grocery store. You can buy a case (12) of empty ones with the lids for just a few dollars. I put a strip of painters tape down the side vertically and using a ruler mark off inch marks up from the bottom to the top. (about 4" actually) When I mix the shellac and alcohol 50%, I just pour in 1" of shellac and then 1" of alcohol and stir. To apply the finish to the project I use a brush or rag. I have and do use the foam brushes at times but the alcohol will dissolve the foam and leave pieces of foam after a short while so be careful and toss the brush when you start to see it expand and fall apart.  :D The nice thing about the mixture is that the alcohol is a solvent for the shellac so it makes for easy clean up when you are finished with a bristle  brush or to clean your fingers. I have an extra jar of alcohol just for clean up. Be sure and use a piece of tape on the lid of the jar to mark what mixture is in it.
Warning! Do not leave the mixture sit in an open container for very long. The alcohol will evaporate fairly fast, draw water into the mixture and, not to mention that it could be a fire hazard!

For my "Rude and Crude" finish, I Pour in 1" of BLO, 1" of mineral spirits and 2" of polyurethane. Mix well and use a brush to apply. I do use a foam brush with this mixture as there is no alcohol in it, and use a jar of mineral spirits for clean up. I have had very good luck with this mixture for popping the grain and a final finish all in one!
Warning! Wrap the threads of the jar with a lap or two of teflon tape as the mixture will seal the jar so tight that it can't be opened easily. I sometimes have to wrap a leather belt around the jar to hold it so that I can unscrew the lid.  :D

I like both of these finishes because they are simple, easy to apply, dry fast and usually come out "Lookingood!" for clear, natural wood looking finishes.

Rog

PS... Yes, I buy alcohol by the gallon!  ;) :D ;D

517
The Coffee Shop / Re: TOO FUNNY NOT TO PASS ON!!
« on: September 21, 2013, 09:23:41 am »
I laughed out loud and have tears running down my face!  :D :D :D :D :D :D

The things people say without thinking! Remind yourself to think BEFORE you speak!  :D :D :D :D

Rog

518
General Scroll Saw Talk / Re: Favorite purchase over $100, excluding the saw
« on: September 18, 2013, 06:32:18 pm »
I would have to include a drill press among one of the most used tools in my shop.
I build a lot of different projects out of wood and I would say that on almost every one including scrollsaw work, the drill press is used in some way. Drilling holes using a #53 bit to a 2-1/2" forstner bit or sanding round or curved items can be done with this tool with good precision.

Rog

519
The Coffee Shop / Re: Gun Control?
« on: September 17, 2013, 09:42:26 am »
The best gun control is the ability to hit what you are aiming at.

Rog

520
Pattern Requests. / Re: Phoenix Police
« on: September 16, 2013, 05:39:47 pm »
I would be careful about using red oak on this cutting. It tends to splinter and crack and break anyway and with this detailed of a cutting it could be a problem.
I don't mean to discourage you but, you might consider another tighter grained wood like cherry, maple or walnut for it.
When making a cutting with this fine of detail almost any solid wood is very difficult to use. That is why most folks use baltic birch plywood and stain it if necessary for color.
I would hate for you to get halfway finished and have a big chunk break out on you it can be very discouraging.
Good luck. You have done a fine job on the practice piece.

Rog

521
General Scroll Saw Talk / Re: Finishing question
« on: September 16, 2013, 05:25:21 pm »
I second what Bill said.
However you can use shellac or BLO to seal and/or pop the grain to start with as long as you finish up with two or three coats of poly or epoxy as a protective coat.

Rog

522
General Scroll Saw Talk / Re: Glass In Portrait Frames?
« on: September 16, 2013, 05:19:52 pm »
thanks Rog,
especially the last two pics are quit like what I want.

do you have the inside pics as well?

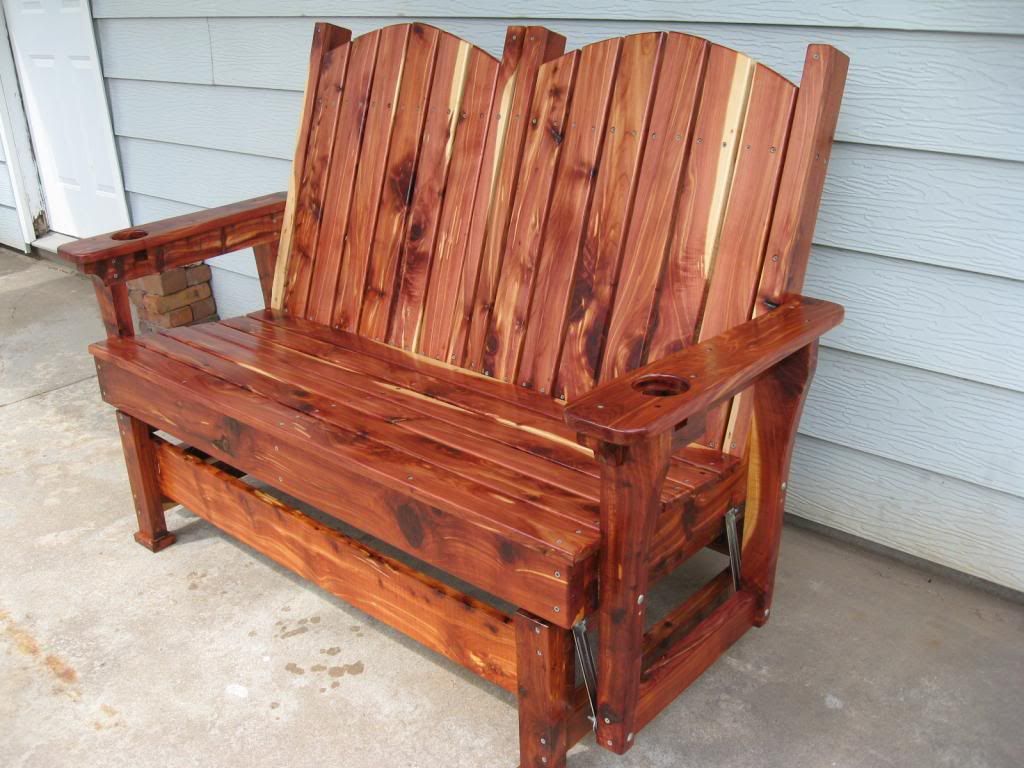
btw I loved that picture of the glider, did you build it?


looks awesome


Thank you.
Yes, I built that glider this spring as a retirement gift for my wife.
We had two awnings installed over our patio to get more use out of it and needed some place to sit and enjoy the summer.
It is made of aromatic cedar wood and I got the plans from Wood Magazine. I seldom use plans (altho I even changed them up a bit on this one by adding the drink holders and the angle on the back) but, this was a big enough project that I didn't want to start from scratch this time.


Rog

523
General Scroll Saw Talk / Re: Glass In Portrait Frames?
« on: September 15, 2013, 08:06:58 pm »
OK, I finally found a picture of the frame I made. It is a bit larger than yours probably and it may be hard to see the stops because of the paint and I put LED lights in between them but maybe you get the idea.
They are used at the top, bottom and both sides of the frame to keep the glass from falling inward.


This is the front of the frame. the trim strip keeps the glass from falling outward.


Does this help you understand?

Rog

524
General Scroll Saw Talk / Re: Glass In Portrait Frames?
« on: September 15, 2013, 07:23:48 pm »
Are you making your own frames? If so, you can cut a groove the thickness of the glass on the inside of the frame pieces using a table saw and install the glass before assembly of the frame.

OR...You can glue some small "stop" strips to the inside of the frame to support the glass and then edge band the face to trap the glass between the strips and outer edge banding.

Hope that helps.

Rog

thangs Rog,

I wan to make it myself, but the first solution will not work for me, I have to paint the frame after it's glued.
and I don't want paint on the glass, so I guess the second one is better.

do you have pictures of that?


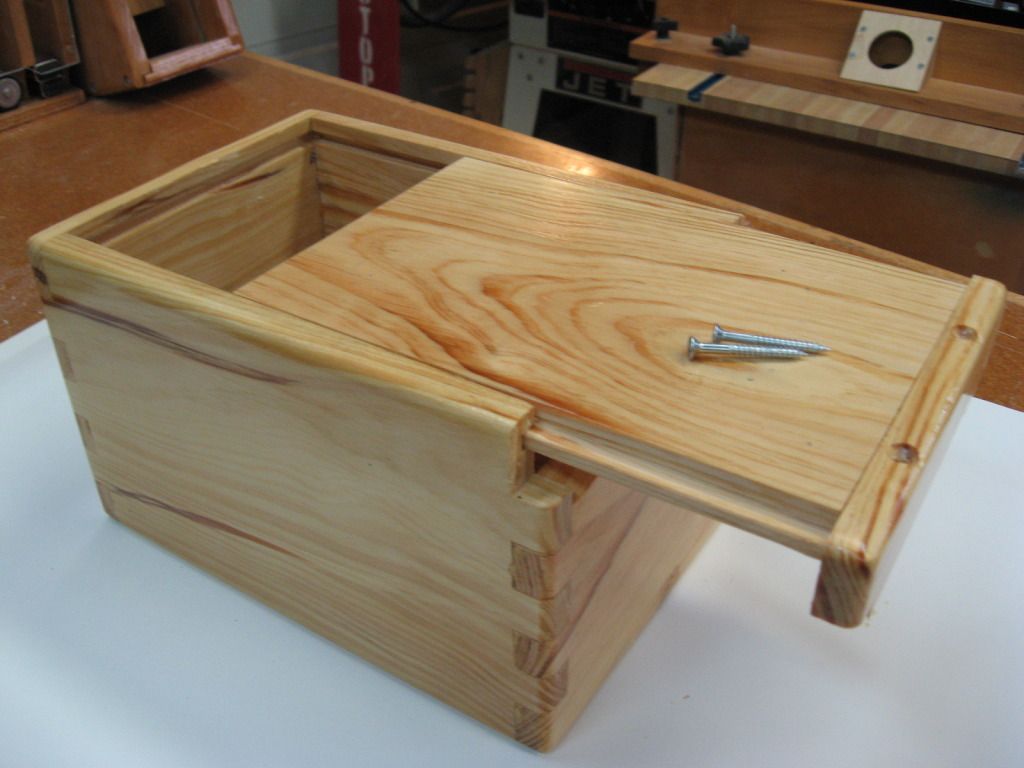
I haven't made any picture frames like the first method I tried to describe but, I use it on my boxes all the time. This is my burial urn shown upside down to give you the idea.


In your case of wanting to paint it, I would paint it before assembly. Just be careful about masking off the areas that will need glue and then you can touch up the corners if necessary after it is glued.

I'll try to find a picture of the second method using the backing strips. I know that I framed two stained glass windows not long ago with that method.

Be right back....

Rog

525
General Scroll Saw Talk / Re: Glass In Portrait Frames?
« on: September 15, 2013, 10:29:12 am »
Are you making your own frames? If so, you can cut a groove the thickness of the glass on the inside of the frame pieces using a table saw and install the glass before assembly of the frame.

OR...You can glue some small "stop" strips to the inside of the frame to support the glass and then edge band the face to trap the glass between the strips and outer edge banding.

Hope that helps.

Rog

Pages: 1 ... 33 34 [35] 36 37 ... 98

SMF

Teknoromi