Show Posts

This section allows you to view all posts made by this member. Note that you can only see posts made in areas you currently have access to.


Messages - Rapid Roger

Pages: 1 ... 15 16 [17] 18 19 ... 98
241
Toy Makers / Re: Peterbuilt Truck Plans.... :+}
« on: November 06, 2014, 10:16:20 am »
I for another would not use MDF.
I would use any other solid wood and just shellac it to leave the grain and/or color show through. Even soft pine has an interesting grain at times and variations in the color.
Sometimes if you use two different colored woods together in the right way, the project seems to look better than painting MDF. Not to mention the dust problems with MDF.
Also, if you have a pattern with FORTY THREE pages and very detailed instructions what other advice could any of us give you that would help? Even I don't make tutorials 43 pages long even if it seems "over done" to many other people.  ;D

Rog

242
Brag Forum / Re: 9 Inch 6 Lobed Pine and Appleply Bowl
« on: November 05, 2014, 10:15:46 am »
VERY nice bowl DW!  :D
I like how you mixed the solid wood with plywood.  8) Looks very classy.  ;)
And the shape of it with the handles is a very good idea too.
You may have just inspired me!!! ;D ;D

Rog

243
The Coffee Shop / Re: Free online Hearing Test
« on: November 04, 2014, 07:37:34 pm »
I have the hearing of a 72 year old!.......I'll be 71 this month.
Not sure what that says about my hearing?

Rog

244
General Scroll Saw Talk / Re: Just a Thought
« on: November 02, 2014, 12:13:27 pm »
Paul,
I think that your idea is GREAT  8)
Shellac Is my go to for almost any finish so, you have half of your finishing process done before you even cut anything.
Shellac will seal the pores of the wood and help hold it together (fuzzy's) and it helps with staining as well as any other finish you may top it off with.
I would probably do both the FRONT and BACK of each piece. Stop the fuzzy's and start the front finish at the same time!  ;)
Keep us posted on how your experiment turns out.  :D
You may have hit on the greatest tip for scrollers so far this year!  ;) 8)

Rog

245
General Scroll Saw Talk / Re: what should i use for heat?
« on: October 29, 2014, 10:04:23 am »
Does the "shop" have electricity? There are hundreds of electric heaters of all types and most have thermostats these days so they are safe for most places.
Prices vary across the board from $30.00 to $500.00 so surely you can find something in your price range.
Usually the box will tell you how many square feet the heater was designed to heat.
Some have exposed heating elements and some use heated oil to radiate the heat.
Try a home center like Lowe's to get an idea of what works for you.

Rog

246
Tutorials, Techniques and Tips / Making a picture frame
« on: October 28, 2014, 07:05:50 pm »
Well, as I mentioned in a previous post, I made a picture frame today and took plenty of pictures detailing how "I" do it. So I decided to try another tutorial and hope that I have better luck this time.
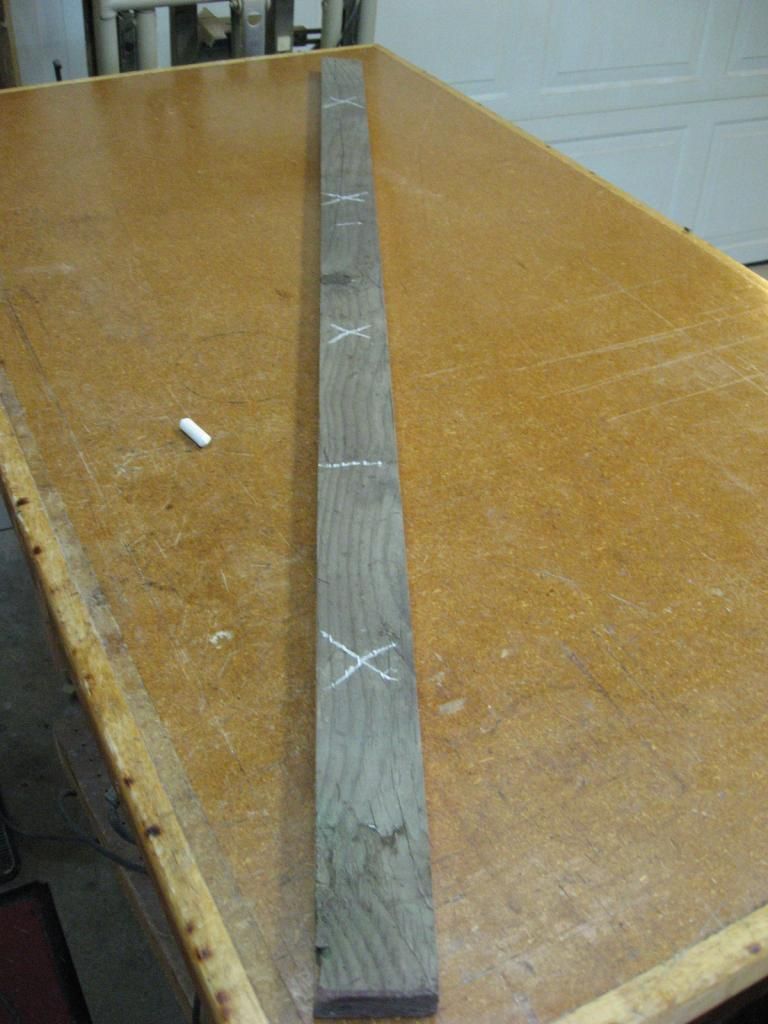
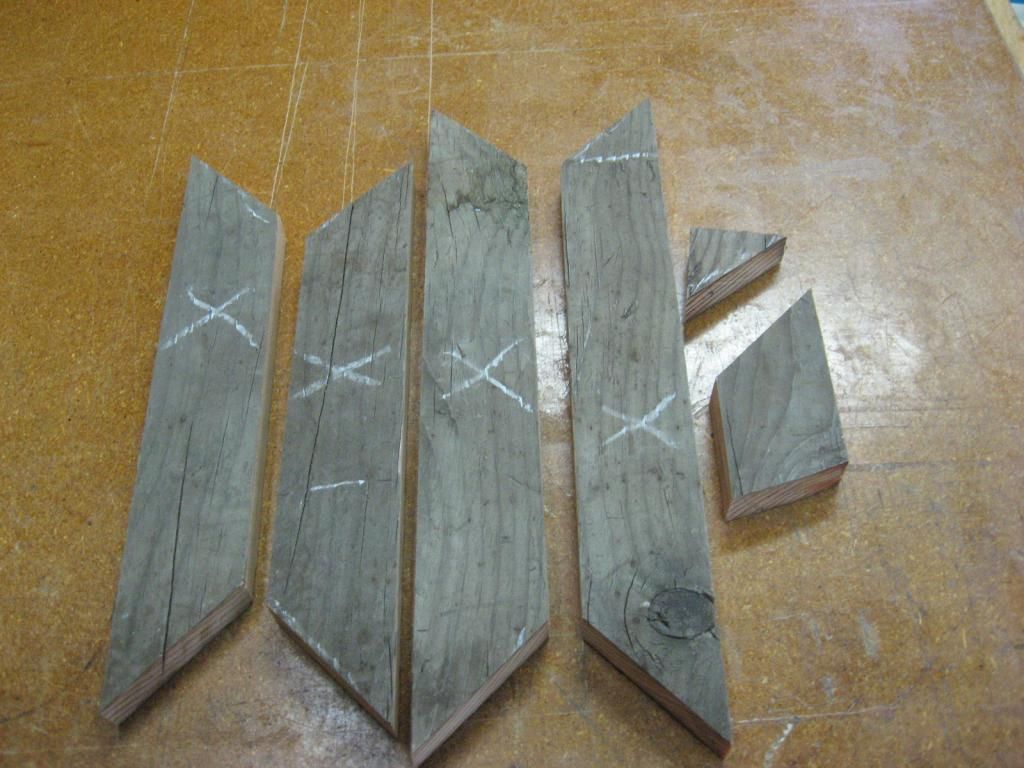
I used a stick of old barn wood that measured 3/4" x 2" x 48" and made a frame for an eight by 10 picture. I realize that most people on this site want frames for scroll work so, I made the dado inside the frame 1/2" deep so it could hold a cutting on 1/4" plywood and a 1/4" thick backer. The outside of the frame measures almost 12" x 14" and I know the first question will be "But Rog, how can you cut two 14" pieces and two 12" pieces out of only a 48" long board? That adds up to 52"! ". Well, it can be done, it is all in how you cut the board as you will see in the pictures.
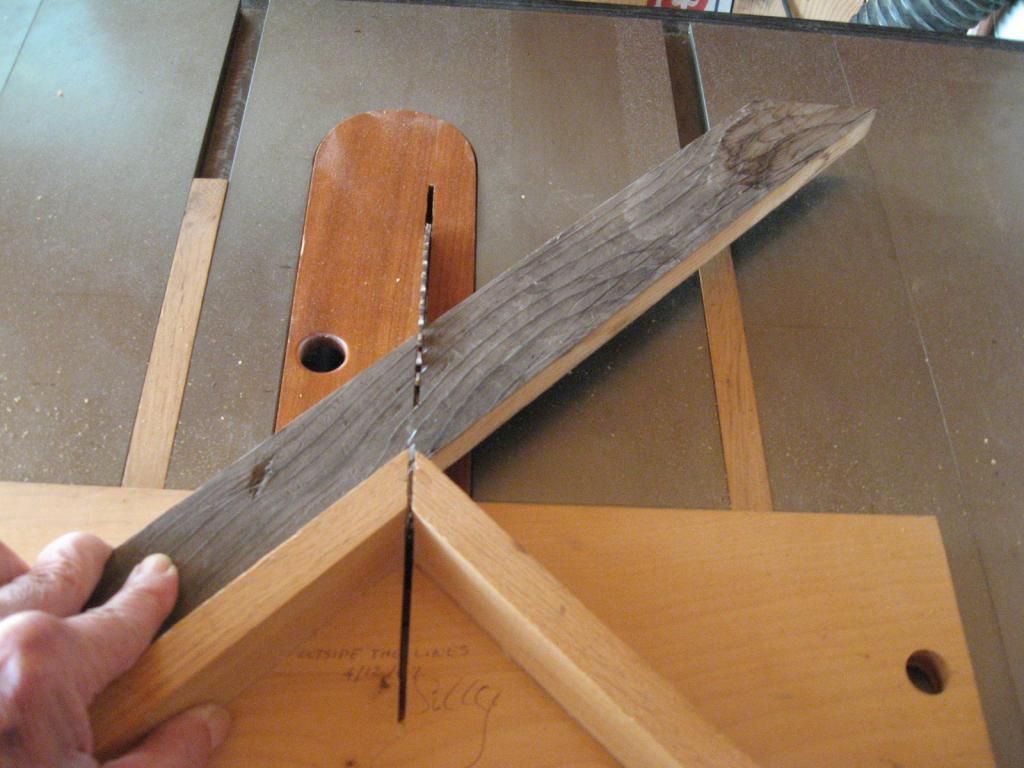


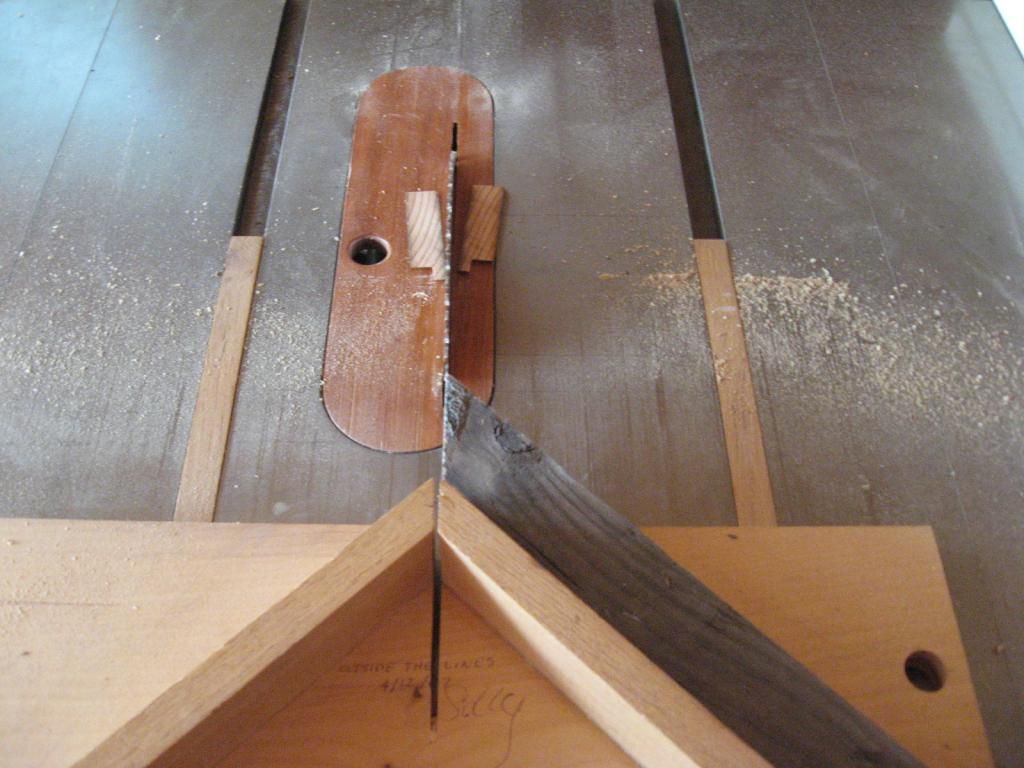
Note that I am using a miter sled and using only the LEFT side and then flip the board over for each cut thereby over lapping each miter by  two inches. Actually all four pieces are cut too long for the final frame at this point and will be cut to final length later using the RIGHT side of the miter sled and the miters will fit exactly.

Here are all four pieces rough cut and the scrap from the 48" board.


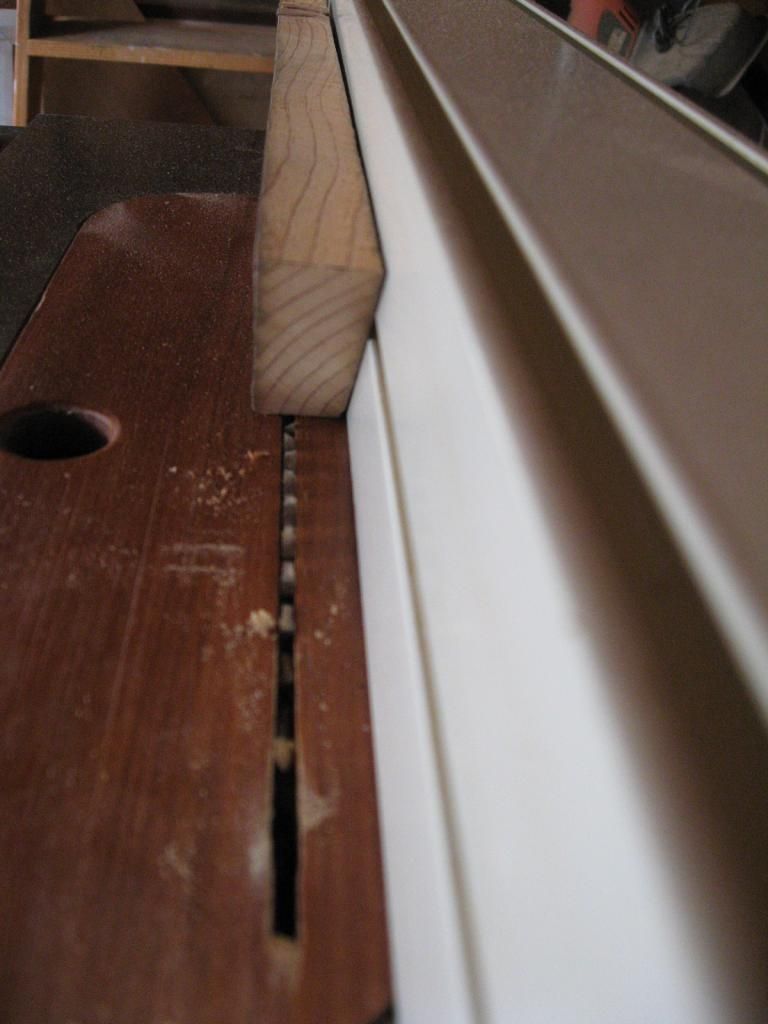
Next is cutting the dado's for holding the picture (or insert) in the frame. I made mine 1/4" wide and 1/2" deep just by adjusting the blade height and the fence for each cut. This would be much easier using a dado blade (which I do own) in the saw or a router bit on the router table but, I just got lazy about changing the saw blade and wanted to show how it can be done without all the fancy stuff that a lot of people don't have.
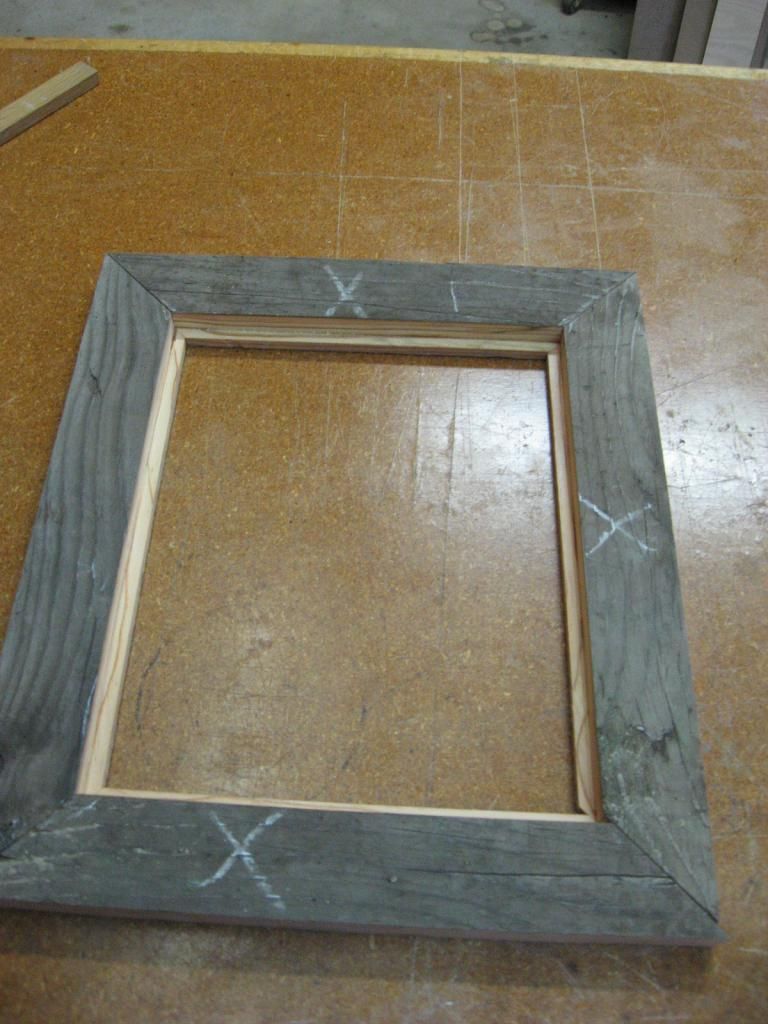


Now you can cut each piece to final length using the RIGHT side of the miter sled. Measure the final length of each side by measuring inside the corner of the dado and transferring the lines to the out side of the board for the cut. I wanted to make sure that the frame would fit an 8" x 10" picture so, I made my measurements 8-1/8" and 10-1/8" so there would be a bit extra room.


Make VERY SURE that the top and bottom rails are EXACTLY the same length and both sides are EXACTLY the same. The usual problem of making sure the miter angles will fit was taken care of with the miter sled already.

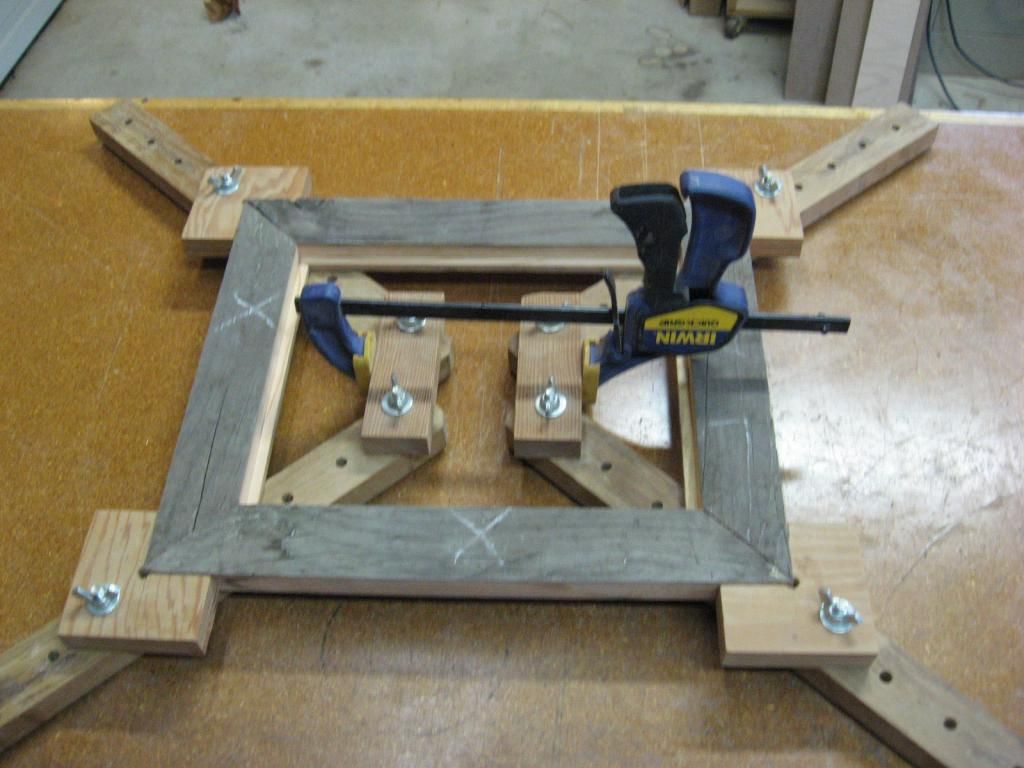
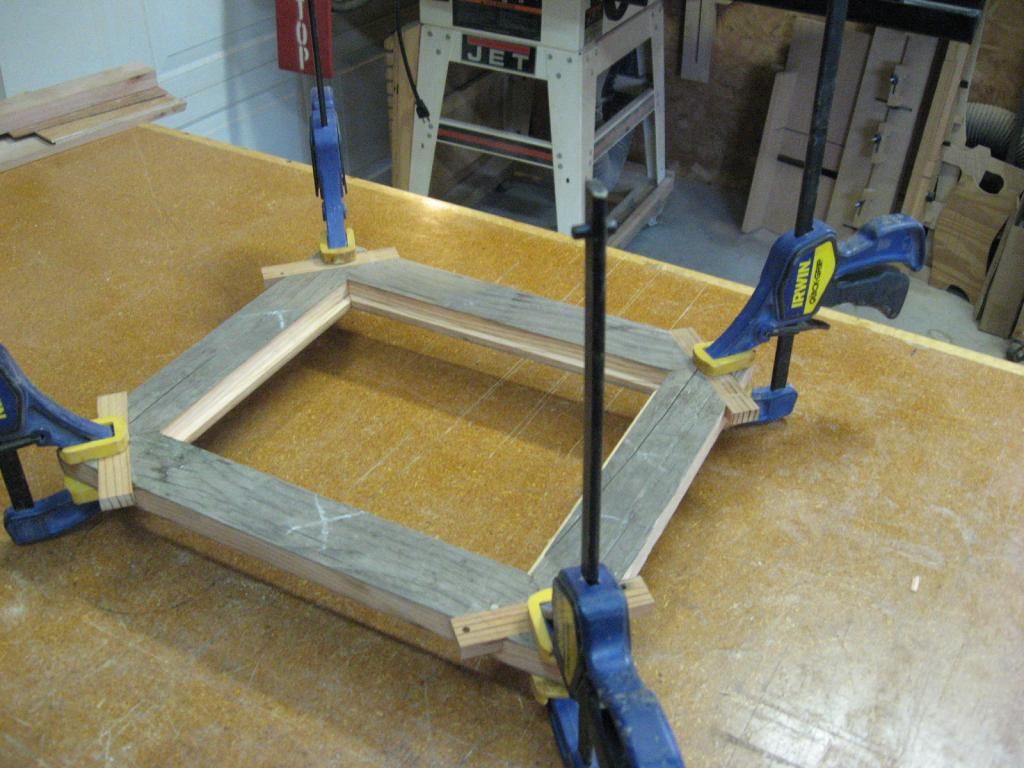
Now for the glue-up....I have a jig that does a very good job keeping everything square and flat and can glue all four corners at once. Still, I highly recommend "cross measuring across the diagonal corners" for insurance.
Note that my jig only requires ONE clamp! 
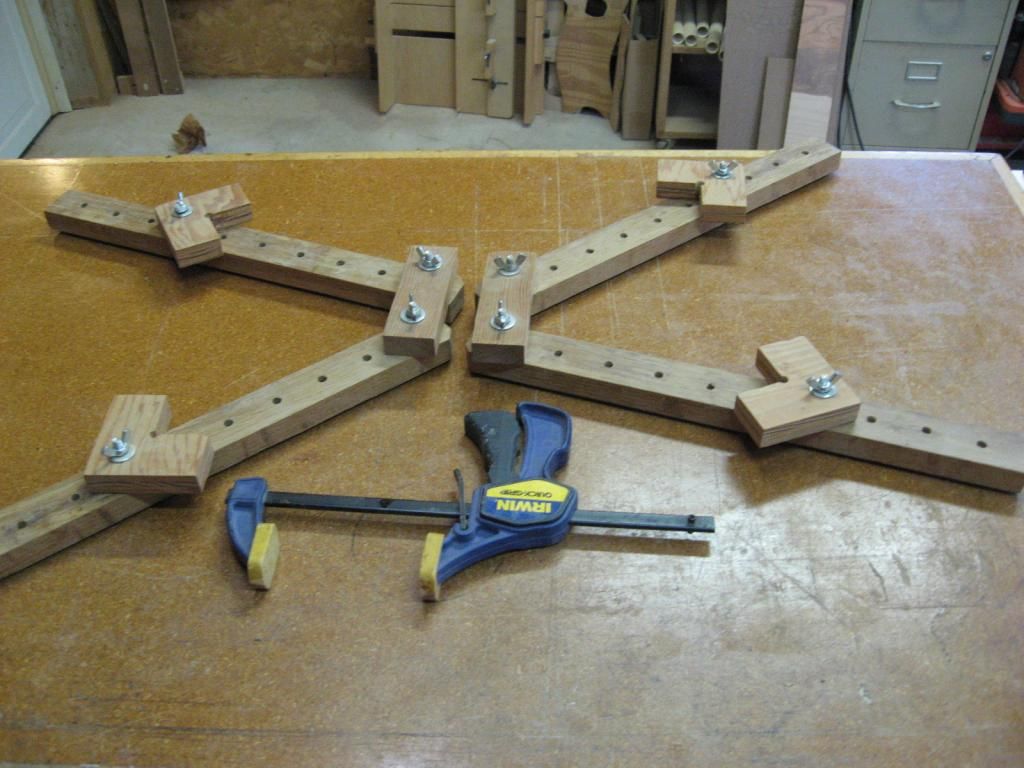


Now that the glue-up has dried for about two hours, we can take it out of the clamps and make the splines. Being careful about handling and/or dropping the frame. End grain gluing is NOT very strong anyway and being mitered corners does not help. That is why we are putting splines in the corners. These splines are made for STRENGTH and not beauty as most are so I'll put them on the back and more or less out of sight. You will be able to see them if you look, on the edges but, WHO LOOKS AT THE EDGES OF A PICTURE FRAME!?!  ;D
The groves for the splines can be cut using a dado blade in the table saw or could be chiseled out but, I cheated and used the router table. Well, it was already set up with a 3/4" straight bit and all I had to do was adjust the depth a few times so who could blame me?  ;)
I made the groves 3/4" wide and 3/8"deep.
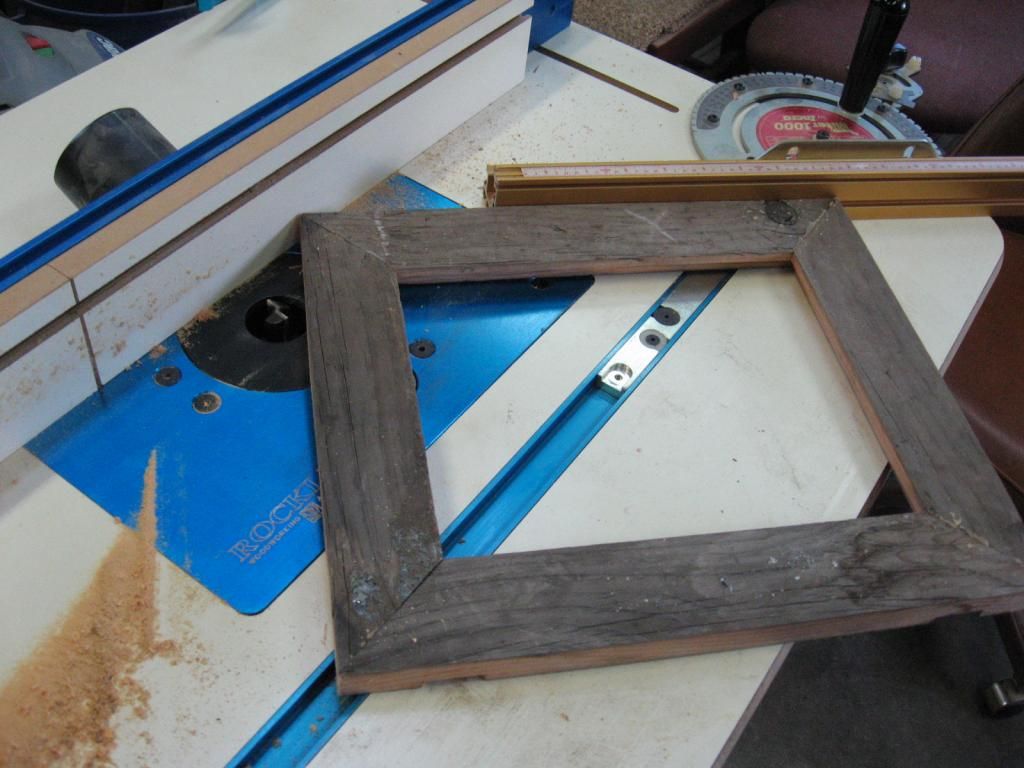


Grab a piece of scrap and make the splines...3/4" x 3/8" and glue short pieces into the groves.


Once the glue had dried and you trim off the excess spline material, WE ARE DONE!  ;D

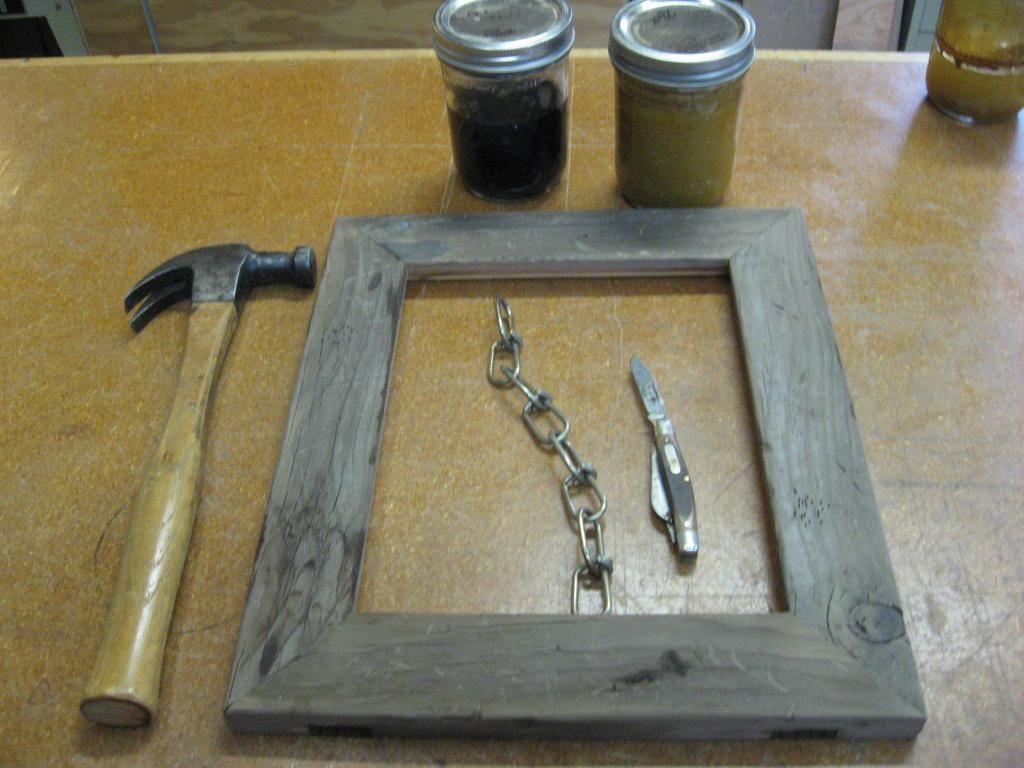
Since my frame was barn wood, I had just a bit of sanding to do and stained the "new" wood edges with a vinegar/steel wool stain I made, and
then beat the frame up a bit with a chain, hammer and knife.  :o


Add a picture or scroll cutting and hang it on the wall!
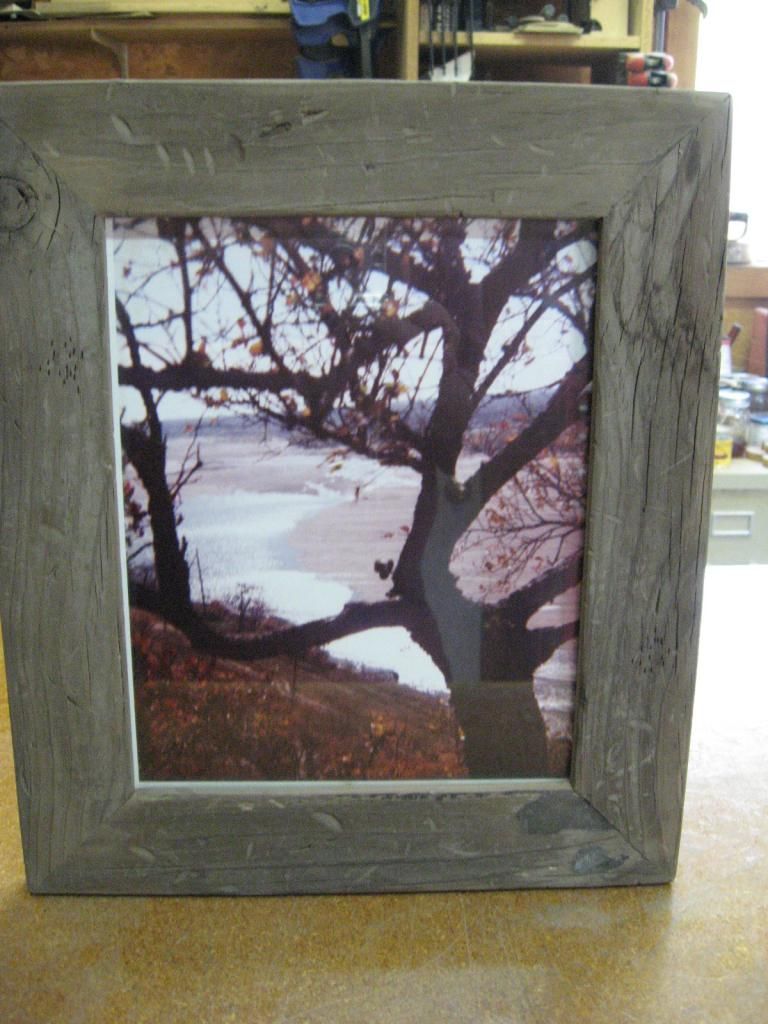


This picture was taken by our daughter back in 1985 when she was only 10 or 12 years old and I have always loved it.

I hope this tute might help someone and give some ideas on how to make one type of picture frame.

Rog

247
General Scroll Saw Talk / Re: Camera recomendation
« on: October 28, 2014, 09:40:31 am »
My pictures quite often turn out fuzzy or not lit properly. But, I look at it like I look at scroll saws, It's not the machine, it is the nut behind the blade (or lens in this case). Practice helps everything go easier.  ;)

Rog

248
Tutorials, Techniques and Tips / Re: Framing the Picture
« on: October 27, 2014, 06:38:41 pm »
It's funny that you should bring this up today. I was thinking just this morning that I might make a picture frame and maybe take some pictures and make another tutorial about "how I do it".
I have a jig that will clamp up the entire frame all at once using only one clamp! That and another way to add splines for strength on mitered frames (but the splines don't do much for "looks").  ;)
Guess I have a project for tomorrow!  ;D

Rog 

249
The Coffee Shop / Re: Sometimes ya gotta do what ya gotta do
« on: October 24, 2014, 09:42:32 am »
After having three or four beers a day, I have a memory like a steel trap........It's starting to rust up!

Rog

250
The Coffee Shop / Re: Wife's comparison
« on: October 20, 2014, 06:32:37 pm »
I got my wife to watch her mouth finally!....Told her that I had the divorce lawyers phone number on "speed dial".  ;D

Rog

251
General Scroll Saw Talk / Re: Scrolling In Baement
« on: October 20, 2014, 06:22:22 pm »
Buy one of those cheap plastic painters drop cloths and hang it from the ceiling between your work area and the furnace area all the way to the floor.
They are clear, light weight and dust proof and are large enough to make a good sized wall.
It may cost you three or four dollars but, you can hang them with thumb tacks or staples so that it can be removed with out too much damage next spring.  ;)

Rog

252
Brag Forum / Re: Tabletop picture frames
« on: October 19, 2014, 12:11:56 pm »
Edward,

Scroll down this site to "Tutorials Techniques and Tips" I have posted a five part tutorial on how I built the whole thing that includes a lot of different ways an methods of how I built this project.
Unfortunately I had to post it in a five part series and you need to read it "from the bottom up"!  :) Go to "Part 1" first and work your way up hill to "Part 5" for a step by step  ::) :P
But to answer your question....I GLUED IT ON!  ;D

Rog   

253
Tutorials, Techniques and Tips / Re: Picture frame book part 5
« on: October 18, 2014, 09:38:09 am »
Spirithorse  and Fab4,

I have NO problem with you cutting two separate pieces for the frame. Do what is best and easiest for you.  8)
In fact, as you know, I encourage people to try new things and ideas when it comes to wood working and scrolling especially.  ;)
I just wanted to make sure that everything lined up evenly and matched. It was more "material frugal" for me to use the 3/4" thick plywood and cut three pieces instead of cutting two out of 3/4" and two out of 1/4" ply and line up all four pieces evenly at the edges during the glue up or gluing two sets individually. (Guess you don't need to have all four pieces glued as long as you get the hinge notches to match.)
I have no problem setting the fence on the table saw to make consistent cuts all around the rectangle. I do it all the time making small boxes and when I re-saw  thicker boards.
Just "Different strokes for different folks!"

Rog

254
Tutorials, Techniques and Tips / Picture frame book part 5
« on: October 17, 2014, 11:24:44 pm »
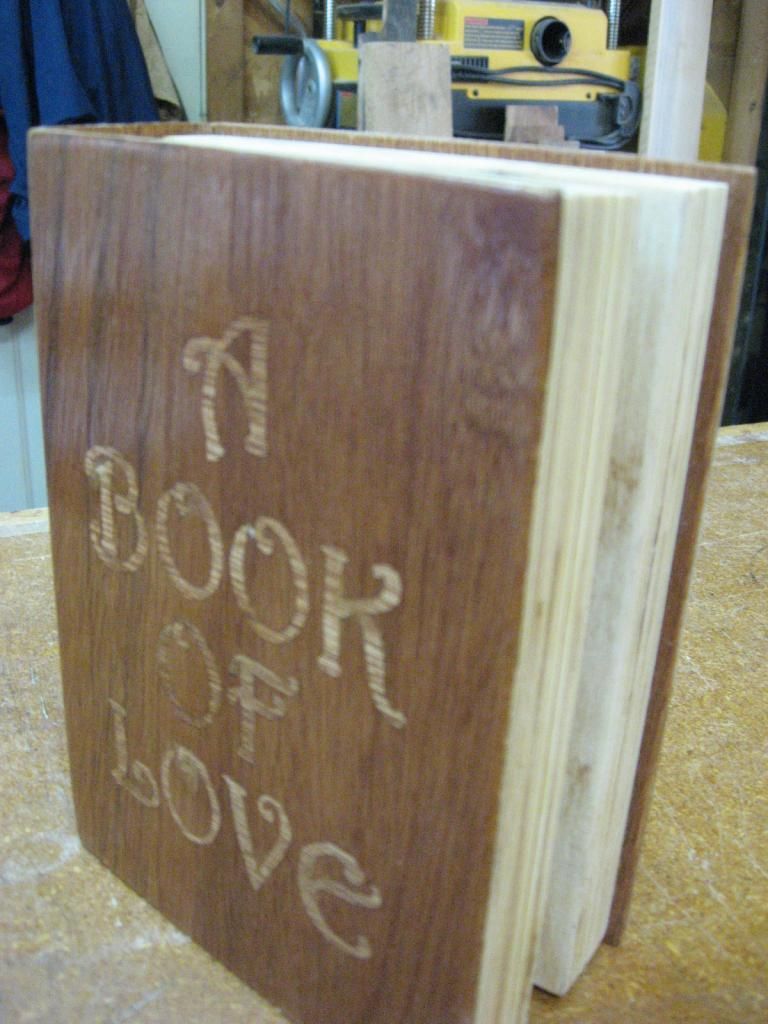
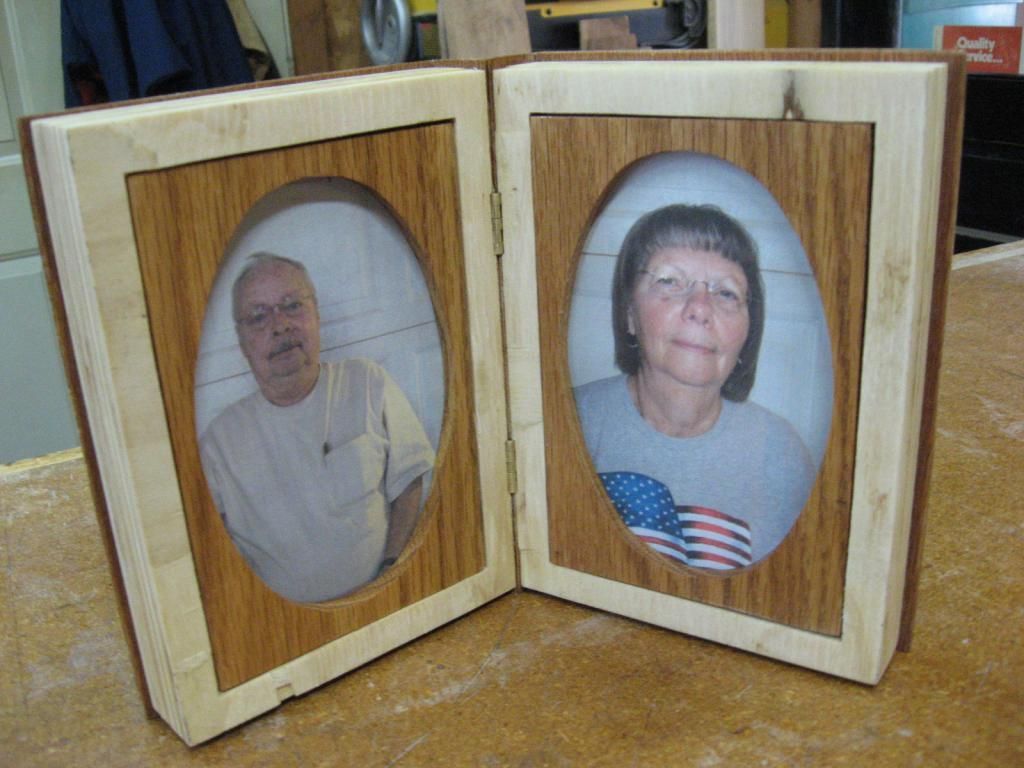
As a reminder, here is my finished picture frame book .


Hope you enjoyed my tutorial. I just wish I could have done it all in one post or at least have it in numerical order. :) For your reading pleasure.
If you have any questions, feel free to ask and I'll try to make up some sort of an answer.  ;D ;D ;D ;D

Rog
Rog

255
Tutorials, Techniques and Tips / Picture frame book part 4
« on: October 17, 2014, 11:05:36 pm »
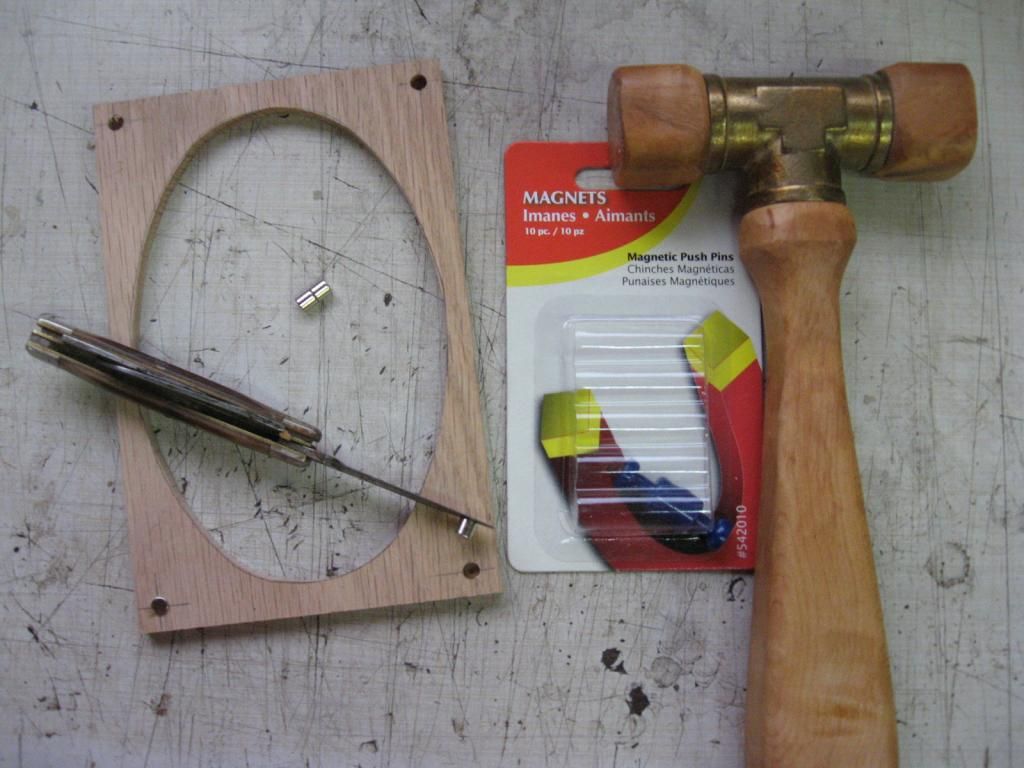
As for the magnets, I buy them at Lowe's (or any home/hardware store) and they come in packages of ten and are fairly inexpensive.
They are the "Push Pin"style magnets that people use to post notes or pictures on their refrigerators. They look like the push pins that are used on cork bulletin boards with the plastic knobs on them but, if you crack off the plastic using a vice or pliers, there is a little 3/16" diameter x 3/16" long magnet that is fairly strong. JUST PERFECT  for this application.
I use an old pocket knife and a small mallet to install the magnet in the 3/16" holes. If there is concern about them falling out (like maybe the hole is a bit too large  ::)) you can put a drop of superglue or epoxy in the hole to keep them in place.


As for the cover, it is pretty straight forward. Just cut two pieces of thin wood about 1/4" larger than the book and glue it on.
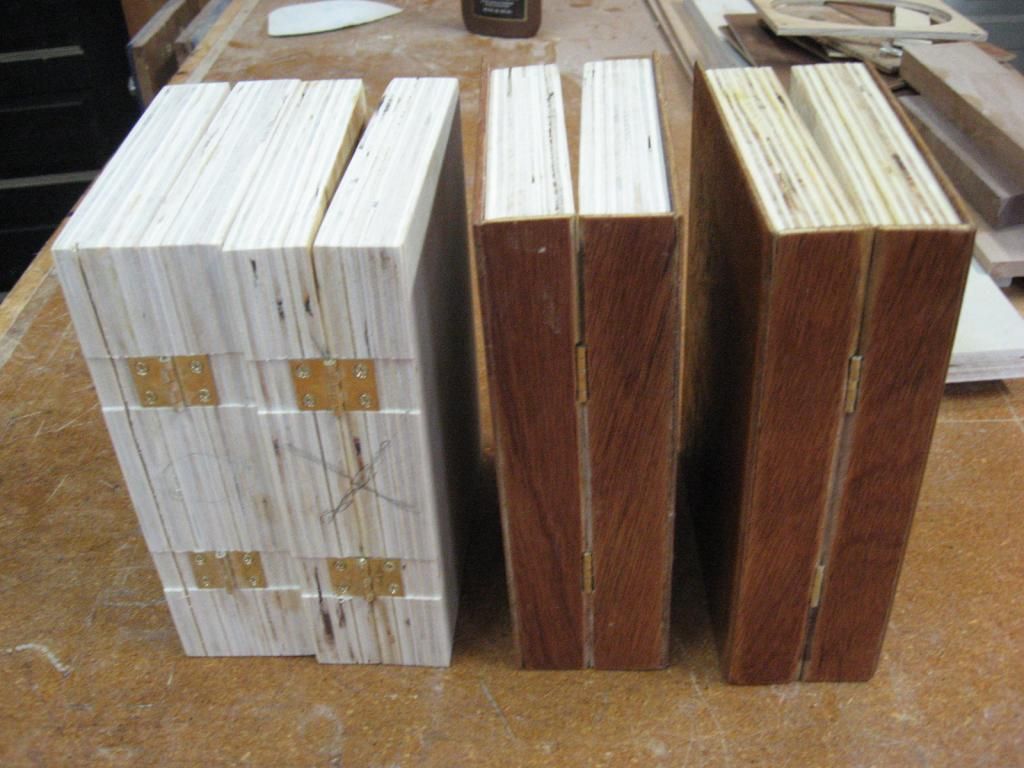
I used door skin material but again, any wood can be used including plywood. I recommend that it be no thicker than 1/16" especially the two pieces for the spine.  Which brings to mind....After cutting two strips of cover material the exact thickness of  one half of the book for the spine, you will need to notch out for the hinge barrels and sand an angle (or taper) on the center edges so that the book will open properly. The angle will have to be 45 degrees or better so that the book will open to at least 90 degrees or more.
As for the inlay on the front  cover.........That is a subject for another tutorial....and is entirely up to you. You can put lettering on it as I did on one of mine or a picture like a heart or anything. Heck, I left the covers on two of my books blank!  ;D ;D


Rog


Pages: 1 ... 15 16 [17] 18 19 ... 98

SMF

Teknoromi