Show Posts

This section allows you to view all posts made by this member. Note that you can only see posts made in areas you currently have access to.


Messages - Rapid Roger

Pages: 1 ... 13 14 [15] 16 17 ... 98
211
Brag Forum / Re: Match box?
« on: January 05, 2015, 10:43:57 am »
Good job Ray!

Ya know, it is funny how we think alike. I just recently made a small box with a drawer and used a golf tee for the knob!  :D

It was a small "magic" box that you put a coin in the drawer and when you close it, the coin disappears. I found plans for it in a woodworking book and thought the grandkids would enjoy it.
I would post pictures of it but there isn't any scroll sawing involved with it other than the box/finger joints on the corners.

Rog 

212
General Scroll Saw Talk / Re: Help me with Finishes
« on: January 04, 2015, 10:51:13 am »
Favorite finishes are just like noses...everybody has one.
You just have to experiment a few times to find yours. I personally don't have a favorite finish, I use them all on different projects. Keeps me interested and I don't do the same things all the time and don't want them all to look  alike.

Rog

213
The Coffee Shop / Re: My Wife wants a Hobby Craft.... :+}
« on: December 29, 2014, 07:34:47 pm »
Come on Danny!  ::)  Just turn loose of some of that cash and buy her a SCROLLSAW!  :)
Everyone comes up with different ideas and designs and between the two of you, you can double the scrolling inventory at the shows.  ;D 8)

Rog

214
Tutorials, Techniques and Tips / Re: How to put Font on wood?
« on: December 29, 2014, 10:06:19 am »
You are quite welcome.
That is why I (and most others) are here, to help when we can.
I tend to be a bit "wordy" and post too many pictures but, as I said a picture makes things so much easier to understand.

I did forget to mention one other thing. When you tilt the table one way or the other (left or right, it doesn't really matter) you want to keep the letter on the lower side of the blade. If the left side of the table is lower than the right, you will want to keep the letter on the left side of the blade to make the letter larger than the background hole in the lower surface. AND you MUST cut the entire letter in the same direction all around. It sometimes looks like the letter is on the right side of the blade when you are making interior cuts but, remember the letter is larger than the background even then.
Hope that helps too.
Just practice a few times (NOBODY does it perfectly the first six times  ;D) and you will have a BUNCH of fun and make some beautiful items down the road. As I often say, "I'll do anything twice."  ;)

Rog

215
Tutorials, Techniques and Tips / Making your own font
« on: December 28, 2014, 02:45:27 pm »
Some times it is kind of neat to make your own font. Yes you can draw! Pick up a pencil and paper and just try to sketch out something that might look cool! OK then, try again, it is going to work out eventually ....


I made these boxes several years ago. The Sullivan box went to my brother and the Chandly box is owned by the widow of my good friend.

Rog

216
Tutorials, Techniques and Tips / Re: How to put Font on wood?
« on: December 28, 2014, 02:32:21 pm »
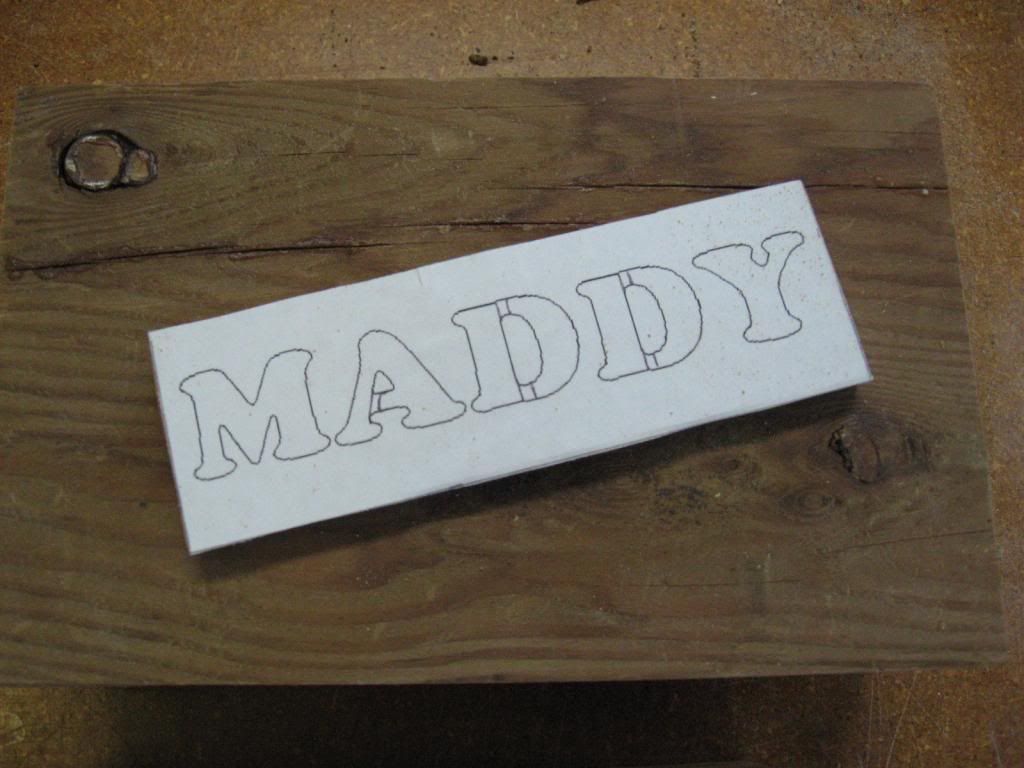
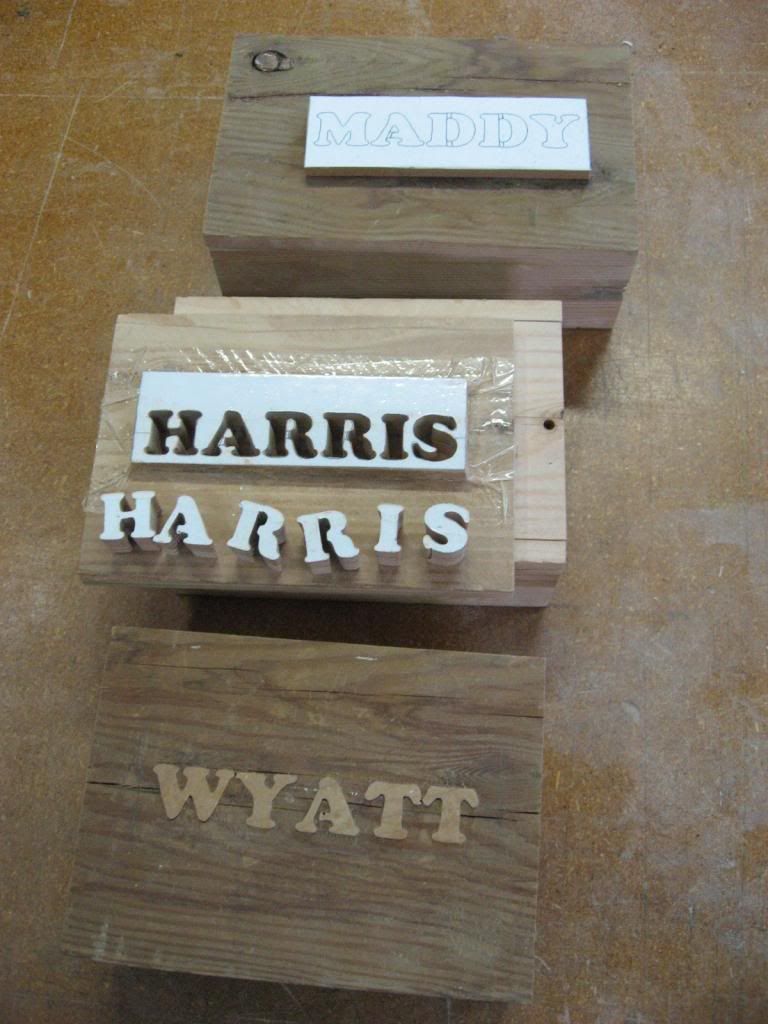
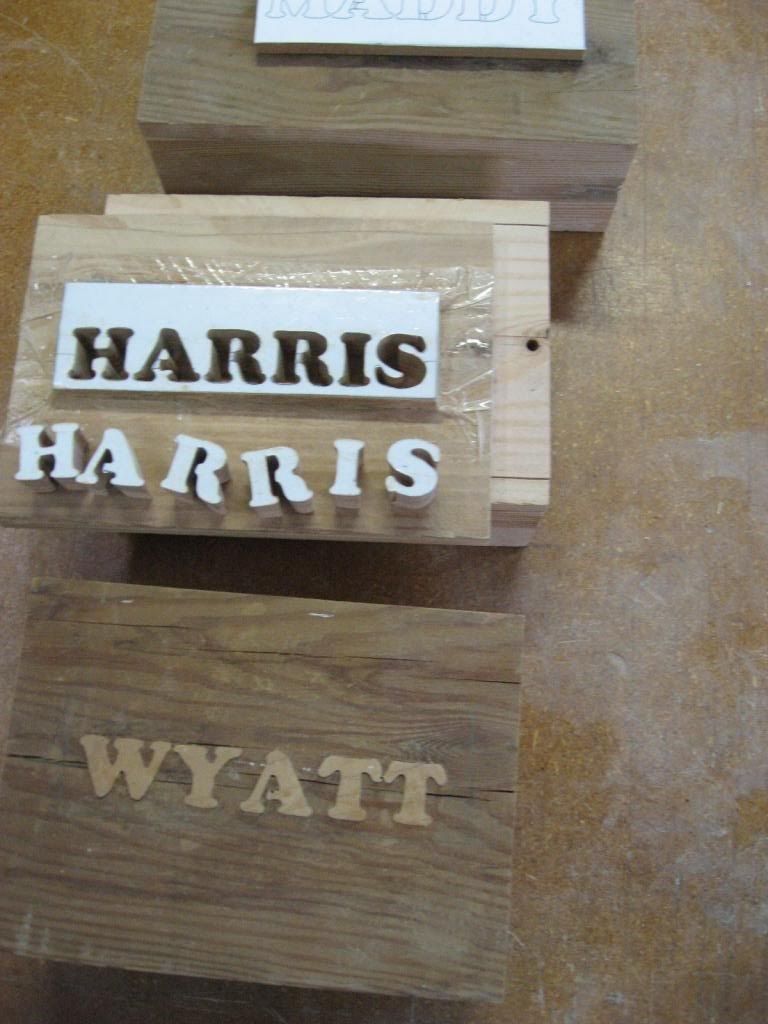
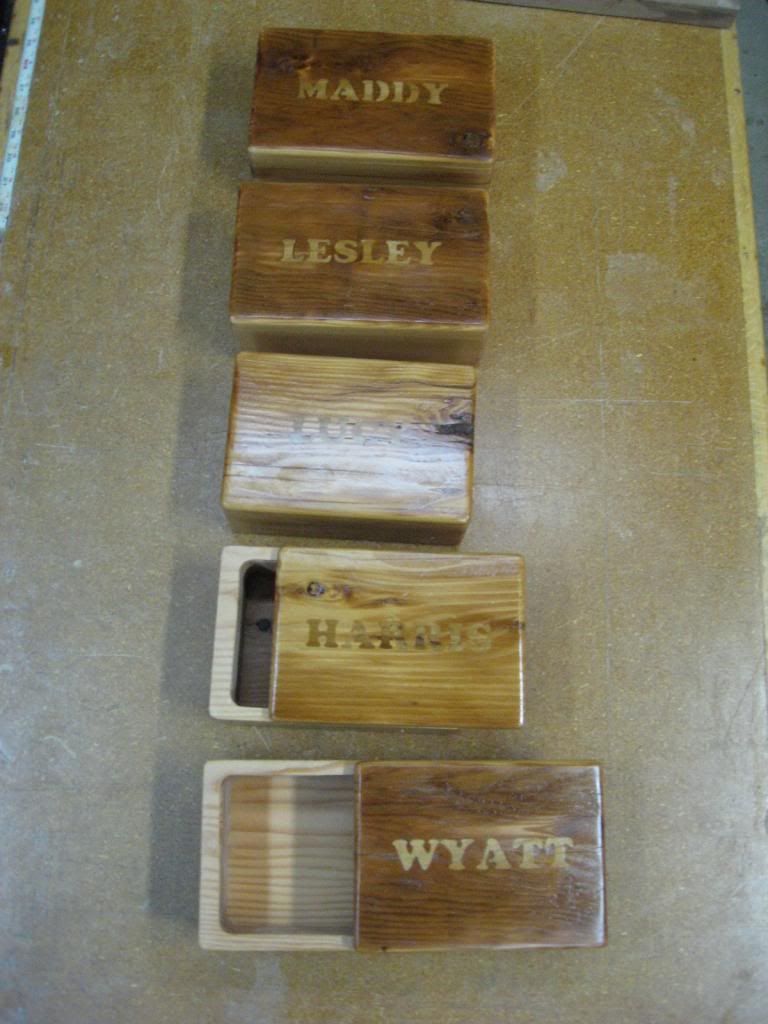
Yes, there is..... And to answer your other question about the centers of "A" and "O" and "R" s falling out, I'll post a picture or two.

To do inlay of one wood into another, you have to tilt the table (or saw head in some cases) to a small degree so that the letters fit into the exact holes and can be sanded flush. The exact degree will depend on the thickness of the wood and the thickness of the saw kurf  (the width of cut that the blade makes when it cuts the wood). The answer to your next question is....Ya just gotta practice!
Use the exact thickness of wood that the piece will be made from and the same blade style and stack the pieces together, tilt the table to around 3 degrees to start with and cut a small (1") circle. Check to see if the inside of the top piece will fall through the hole in the lower piece. If it falls through, you need to add about 1/2 degree to (3-1/2degrees) to the table. If it doesn't want to go but just a short ways into the hole, you will have to subtract a 1/2 degree (2-1/2 degrees). You just need to keep cutting holes and trying various angles on the table until you get the "plug" to fit into the hole. Even then it probably won't fit exactly but if the plug is 1/16" or less proud of the surface it can be sanded down until it is flush. The back side will be UGLY but, don't worry about that.
There are a few video's around the net to show you what I mean.
As to the letter problem...Here is a picture that shows how I used a font and made my own bridges to be used on some box lids.


I hopes that helps explain what I was trying to tell you a bit better. A picture is worth a thousand words.

Rog


217
Brag Forum / Re: Piano for my Mom for Christmas
« on: December 27, 2014, 05:22:09 pm »
That is cool! I really like it!  :)

I once made a "guitar/clock" for my son's Christmas gift a few years back.


Rog

218
OK then...GO FOR IT!! ;D 
Just be sure to post pictures of it. I an really anxious to see what you come up with.  8)
 It doesn't sound like much of a soup bowl but, I can see where it might look really sharp!  ;)
Come to think of it, what do you intend to do with it? Hang it on the wall?  If you do inlay, it might be a cool looking candy dish?  :)

Rog

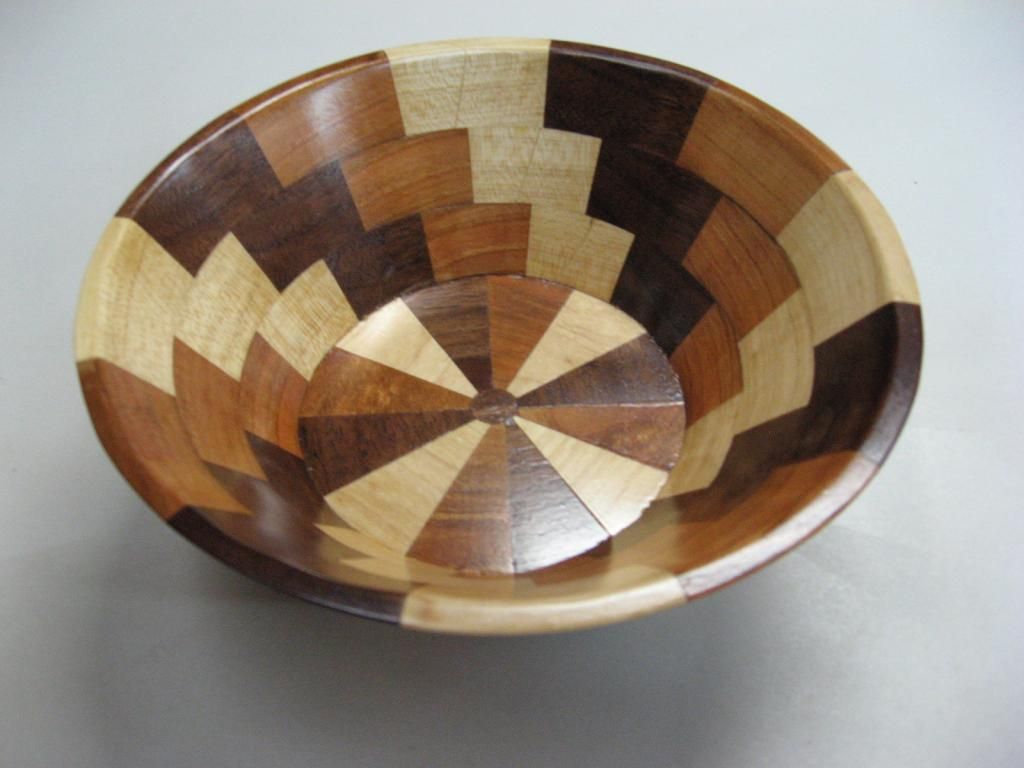
PS....Here is my latest candy bowl. Done on the scroll saw.


Rog

219
I'm not quit sure what your intentions are. Are you wanting to make bowls on the scroll saw? If so, no problem.
But, if you are turning bowls on a lathe and then wanting to do scroll work on the bottom of the bowl or around the lip....."Houston we have a problem".
It depends on how deep the bowl is. If it is 2" deep or less and say 8" diameter, you may be able to do some cutting on the bottom but, the edges are going to be tough. More than likely you will need to use spiral blades so that you don't have to turn the work piece under the upper arm. Or maybe if you remove the table and cut the edges from outside of the bowl and let the bowl hang down over the front but, still you will need a support of some sort to rest it on while you do the cutting.
If I'm understanding what you want to do correctly, you might just as well get a hand powered fret saw and clamp the bowl in a vice to cut out around the edge or lip of the bowl.
Please correct me and explain a bit more about what you are trying to do. Not only I but, there are plenty of folks willing to help with anything scroll sawing related on this forum.

Rog


220
General Scroll Saw Talk / Re: spraying clear finish
« on: December 23, 2014, 10:06:27 am »
Russ,
Not to be a Yahoo but, did you put oil on the wood before spraying? Some oils that pop the grain and look very good but are very slow drying or never dry. Even BLO takes some time to cure and I'm not sure that lemon oil ever completely drys. Also if you put oil on plywood, remember that  there is only about 1/32" of wood to soak the oil in before it hits a layer of glue and quits soaking thus extends the drying time.
Some paint like clear coat products just don't want to work well with any oily surface. Remember oil and water don't mix!  ;)
Personally, I just use oil to pop the grain and as a finish also and just buff the surface with brown paper for a semigloss finish. With most scrolling pieces, they don't get much abuse and a I personally just don't care for the glossy finish anyway.

Rog

PS Just had another thought about the problem....Is the wood you are using an oily wood? Some woods have a natural oil in them and need to be dried out before finishing. You can use alcohol, mineral spirits or something to cut the oil and let it dry for just a few minutes before applying a solid finish. Walnut is an oily wood and so are a lot of other exotics.

Rog (again)  ;D

221
General Scroll Saw Talk / Re: sanding down draft table
« on: December 23, 2014, 09:45:16 am »
I found another video. This one installs the down draft section in a bench top.
You tube...."I Like to Make Stuff".
Bob made his only 18" x 18" but of course the size is easily changed to suit your situation. And he put it in an existing bench, if you are just starting your bench it should be a piece of cake!  ;D

Rog

222
General Scroll Saw Talk / Re: sanding down draft table
« on: December 21, 2014, 04:44:10 pm »
The one I posted has 1/8" peg board with 1/8" holes on 1" centers. No cross bracing under the peg board or any other bracing at all. It has not caved in on me and the shop vac produces enough suction that if I lay a solid, flat piece of wood 6" x 6" or greater the suction makes it hard to pick up. Some times I have to turn off the vac or slide the piece to one edge to flip it over.  ;)
Mine measures 12" x 23" OS dimensions, but I'm afraid the if you get too much larger or increase the hole size too much, you might loose some of the suction power. However, saw dust isn't all that heavy so it may not make that much difference anyway.  :-\
Also the size might make a difference on where you store it if you are going to make it movable. I just don't have all that much room in my shop if I did, I would make bigger table with drawers for sanders and paper underneath and put it on wheels.  ;D
Some of you guys go ahead and experiment with various sizes and materials. I would guess that 1/4" thick peg board with 1/4" holes and about 18" x 30" would be a good place to start. Maybe even perforated metal about 16 gauge would make a nice top?  8)

Rog

223
General Scroll Saw Talk / Re: sanding down draft table
« on: December 21, 2014, 11:33:39 am »
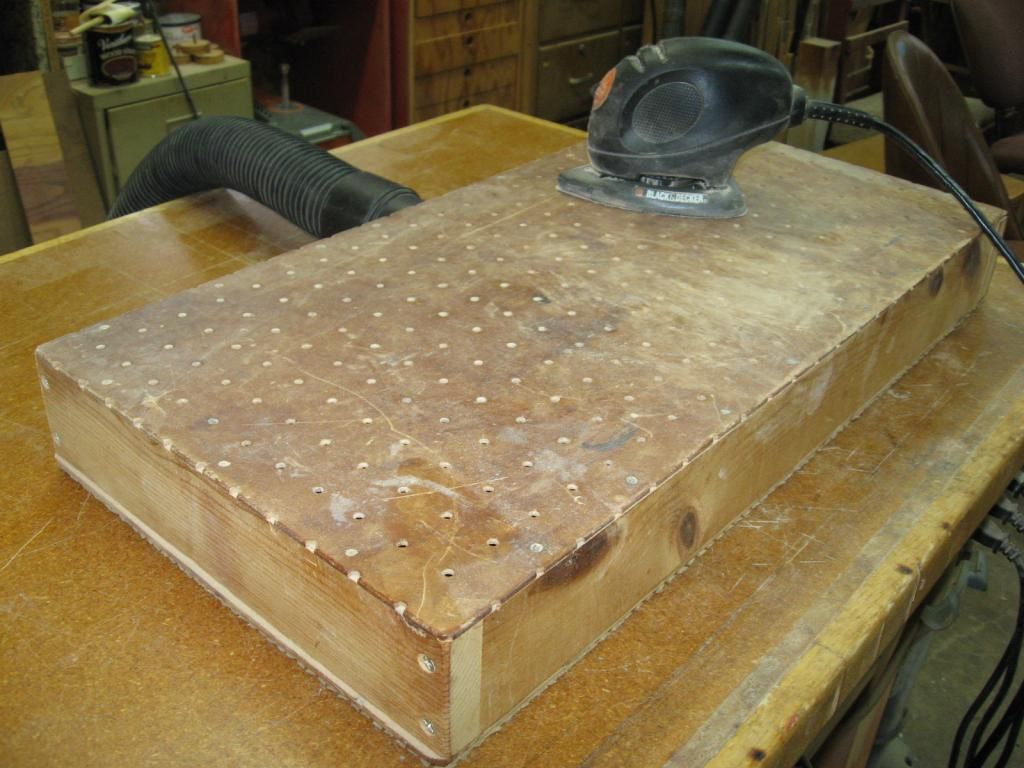
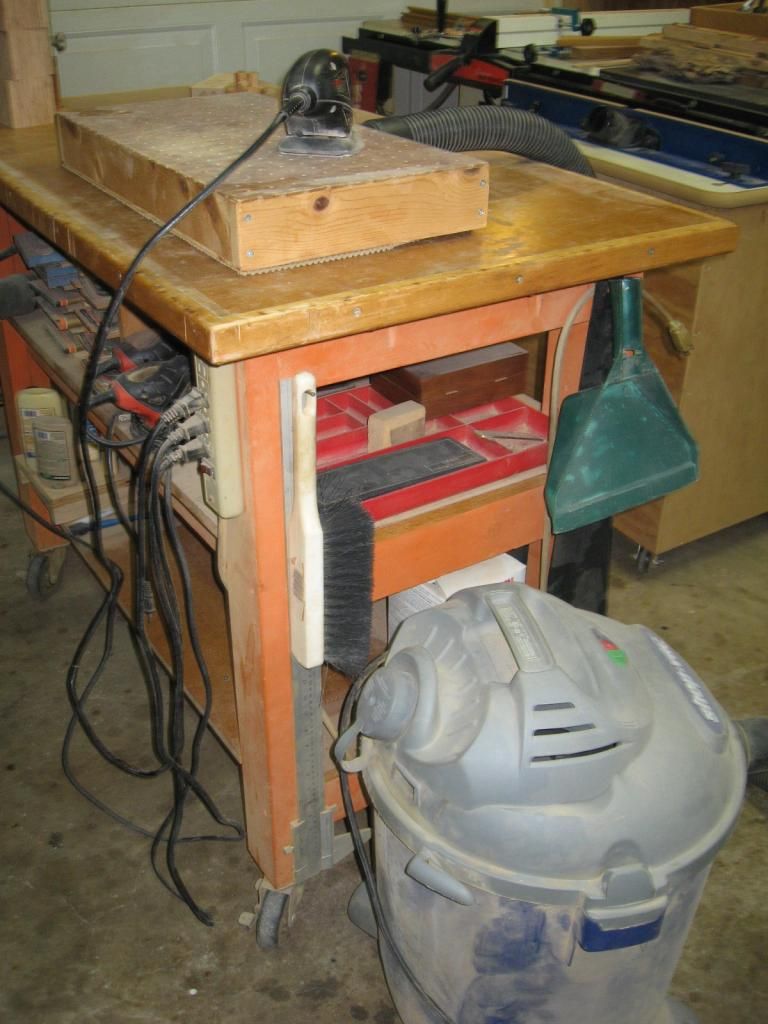
I sounds like you are willing to go a lot further with this project than I am, however I will post a picture of my down draft table anyway.
I actually built it about eight years ago and as a firm believer in KISS, this is what I ended up making.
A four sided box out of 1" x 3" pine, a piece of 1/4" plywood 12" x 23" and a piece of peg board with 1/8" holes on 1" centers. I put some of that non slip sanding mat on the bottom and Use the shop vac for suction. When not in use I sit it on a shelf under my work bench.


It has worked well for me on all my smaller projects for a long time.

Rog

224
The Coffee Shop / Re: Seasonal Tradition Long Gone
« on: December 18, 2014, 10:50:38 am »
We use to draw names with our Aunts and Uncles that came for Christmas.  One of my Uncles drew my name.  About a week before Christmas he came over with my present all wrapped up only he had cut a small hole in the top of the package.  He also brought along a small bag of cracked corn and told me I had to put a little in each day to feed whatever it was. Also, do not shake or move the package around or I might hurt it.   I fed it each day and protected the package for a week until Christmas.  When I got to open the package,,, it was a basket ball hoop!


I GOTTA REMEMBER THAT ONE!!  ;D ;D
That is the best thing I've heard in a long time. Guess what the grand kids are getting next year!!  ;D ;D   Not sure of the gift yet but, the box will have a hole in it!!  ;D ;D

Rog

225
The Coffee Shop / Re: The Grand Canyon - U.S.A
« on: December 13, 2014, 06:52:07 pm »
Here in flat country we call that fog.  ;D

Rog


Pages: 1 ... 13 14 [15] 16 17 ... 98

SMF

Teknoromi